My adventure with Loupedeck products started over a year ago, when I decided to buy the “+” version of the console. And I must honestly admit that the experience of using it was absolutely positive, but… for three weeks now I have the pleasure of using the Live version. So what caused the desire to change?
LOUPEDECK LIVE; MORE CT OR "+"?
The “+” version is a product tailored to Lightroom; the most important buttons and knobs are physical and always in the same place. This makes the work incredibly easy, because the muscle memory means that we can only look at the screen and the hands and fingers find the right places on their own. These features made it difficult for me to imagine working without Loupedeck after a few days. But in the case of Photoshop, it was not so rosy. I don’t know, maybe I just couldn’t configure something properly…? Finally, any support for DaVinci Resolve support was simply missing.
When the CT version appeared on the market, it was a small revolution. This console is completely different, much more universal, with native support for many programs (including Lightroom and Photoshop). However, what is even more important, also with the possibility of creating your own profiles, which, using keyboard shortcuts, allow you to operate programs that the Loupedeck API does not have access to yet. The console has both physical and electronic knobs and buttons located on the touch screen.
So where is the newest Live? It is definitely closer to the CT version, you can actually say that it is the younger brother, which does not have some buttons and a large knob, but with the right command mapping, it allows you to achieve exactly the same. I haven’t had a chance to check the CT, and I assume these extra buttons are probably more convenient to use. On the other hand, the Live received a small addition in the form of a stand mounted on the back of the console, which allows you to set the device at an angle, and I admit that such a setting is very practical and convenient. In the end, however, we always come to the price; at the time of purchase, the equipment was available only on the manufacturer’s website and the difference between it and CT was about 1000 zlotys. I did not think for a long time. 🙂
HOW IS LOUPEDECK LIVE WORKING?
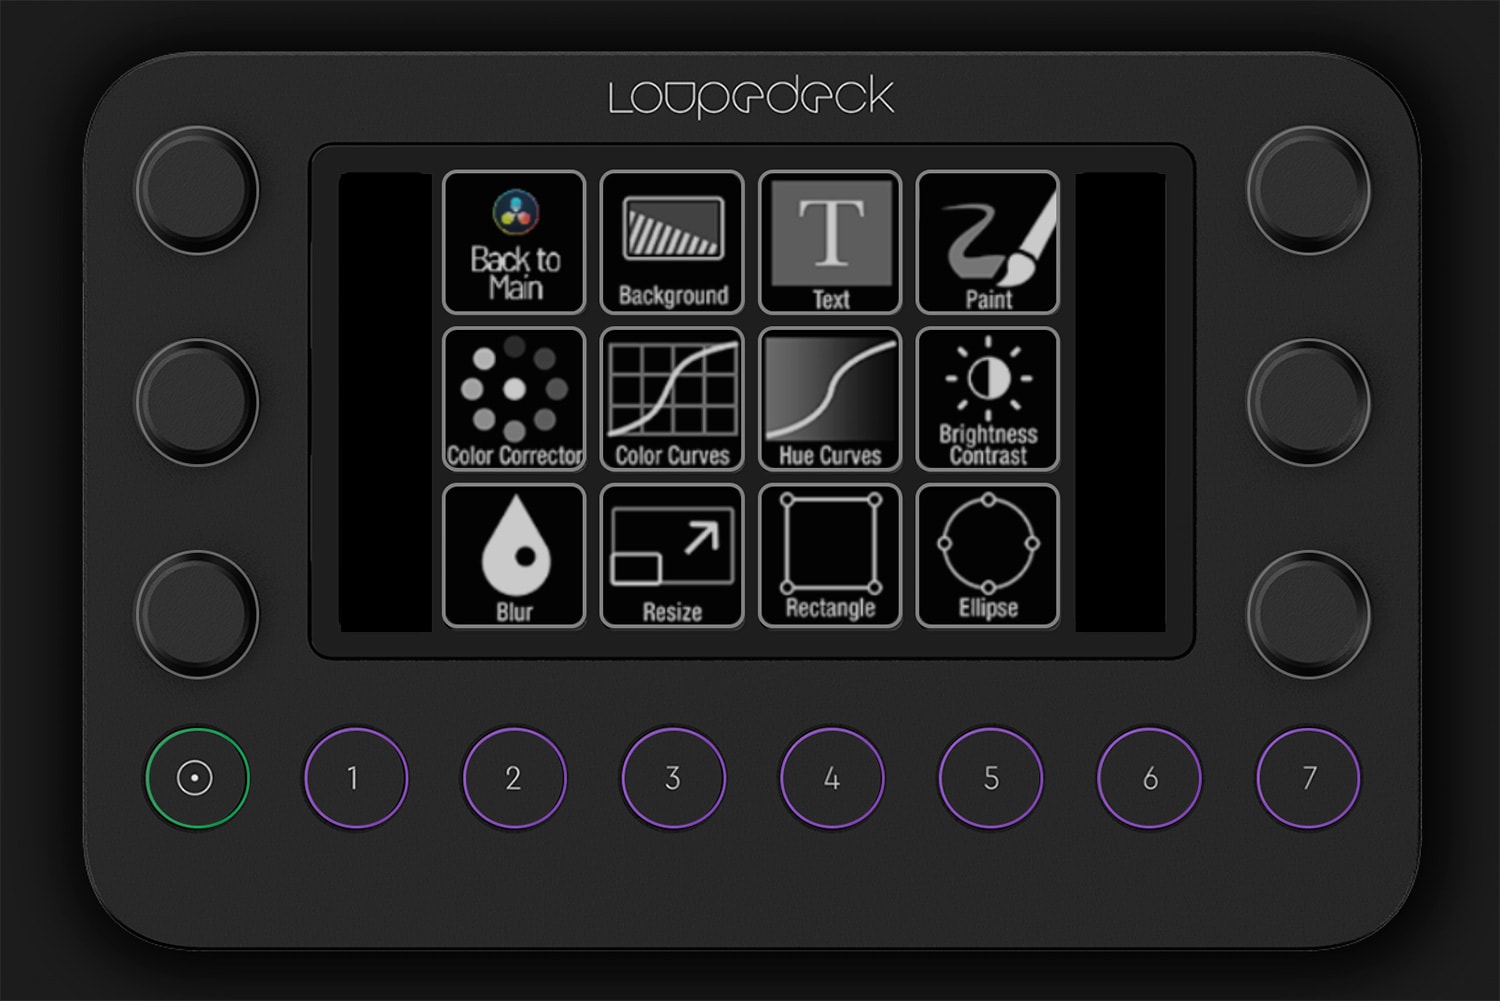
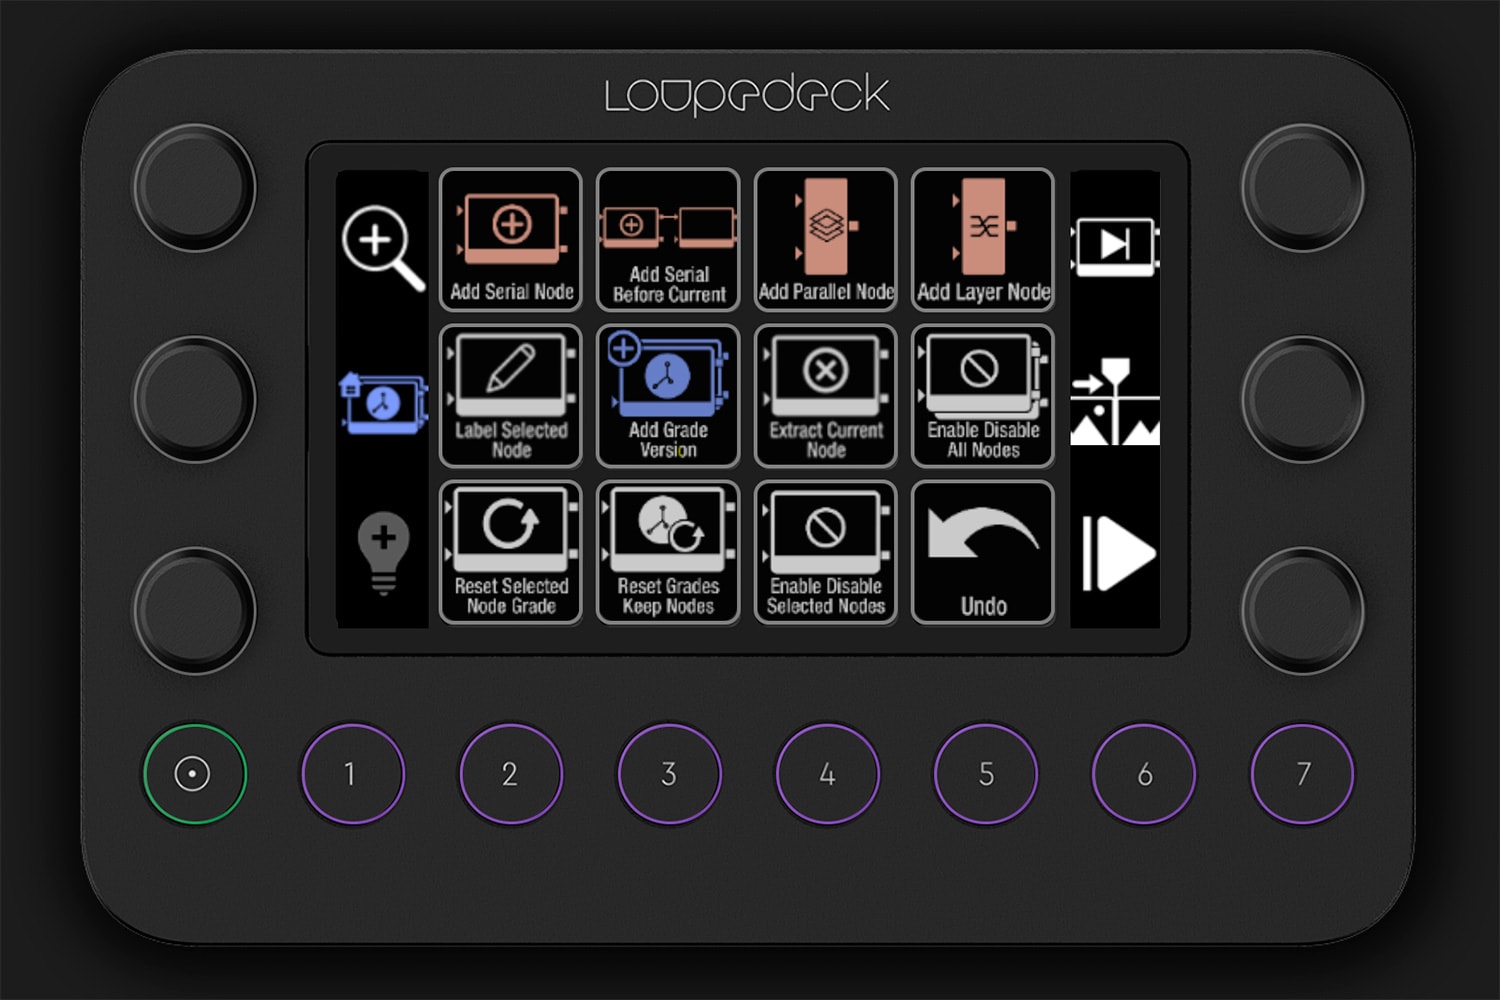
Loupedeck Live offers eight round physical buttons, six knobs, which, apart from the function related to rotation, can also serve as buttons and a touch screen, on which we have twelve fields for buttons and two additional fields on the left and right for describing and changing the functions of the knobs. Only these circular buttons are programmed permanently, while all the others may work completely different depending on your workspace. What’s more, even within one space, you can also change them by sliding your finger on the screen horizontally in the central part, and vertically in the side parts. Thanks to this, for example, the same knob in the Edit space can be used as JKL, but also as a function that marks a clip with a specific color.
CREATING OF OWN PROFILES
Before I start talking about the experience of using the console, a few words about the possibility of building your own profiles. After creating an account on the manufacturer’s website and installing the software, we can import ready-made native profiles of a dozen programs (the list on the website www.loupedeck.com), as well as ‘custom’ profiles based on keyboard shortcuts to more than twenty other programs. What, however, is extremely important; you can modify these profiles and create your own! Let’s assume that in DaVinci Resolve, in the Color tab, I like to have order and name all nodes. In ‘Keyboard Customization’ I set up a new shortcut, for example Tab, which starts the naming function, and then I add the same function in my own profile for this program.
At this point, thanks go to Szymon Jędrys, who created a great tutorial on how to use the Loupedeck CT in Resolve (link here). After watching his film several times and using my own experience, I set up my own profile, which worked almost perfectly…
ICONS!
Exactly! It’s nice to map a lot of buttons and shortcuts, which makes the so-called workflow but, let’s call it a certain inconvenience, all buttons on the touch screen look very similar, only the text differs. Of course, I knew you could add icons, but where do you get icons for so many shortcuts, create them yourself? Waste of time. So I decided to invest about 120 zlotys to buy a bundle (from the www.sideshowfx.net store), which contains over 1,300 ready-made icons in 4 versions (with and without a signature and on a black and light background), 860 predefined shortcuts, a file with shortcuts to be imported to Resolve and a ready profile for Loupedeck CT/Live. Is it 120 zlotys a lot? It could be less, but these icons really do the job! Practically the next day, I noticed that I visually associate the given functions and I do not have to think and stare at the screen.
MY MAIN SETTINGS
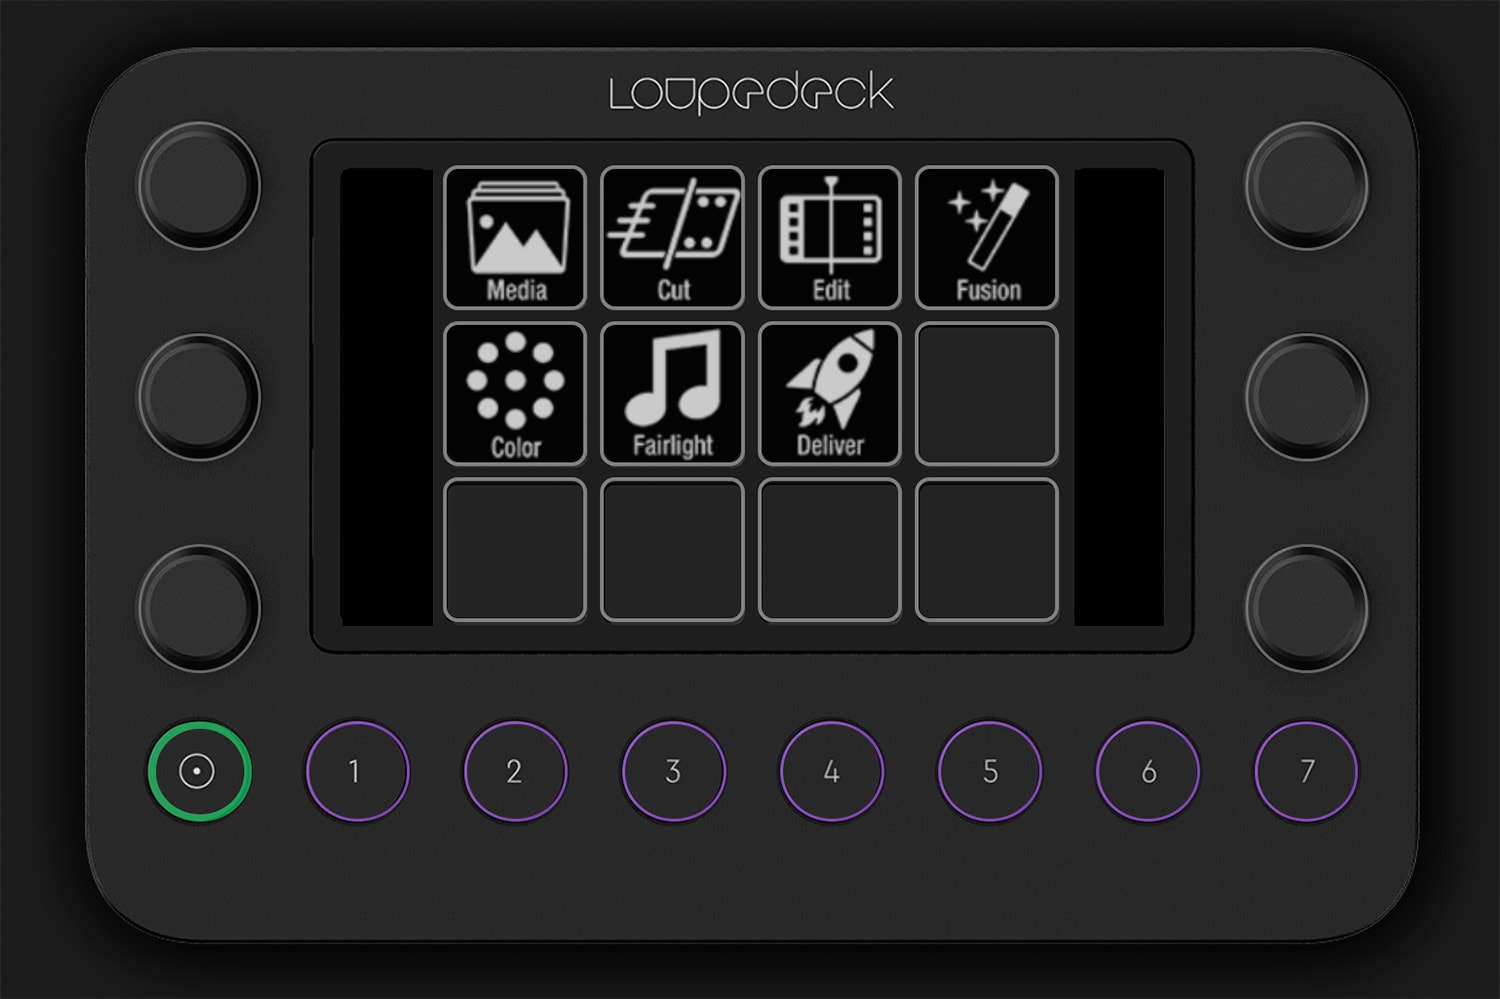
OK, let’s get down to business! I mentioned eight circular buttons that are fixed (numbered 1 to 7 and a home button). So far, I have defined the following workspaces and the associated buttons:
- Main (Home button)
- Media (1)
- Cut
- Edit (2)
- Fusion (3)
- Fairlight
- Color (4)
- Deliver
In addition, I programmed button 5 as Stop, 6 as Mark In and 7 as Mark Out. This is how I got quick access to the spaces and functions that I use the most. Whereas access to other workspaces allows me to go to Main and use the touch buttons.
MEDIA
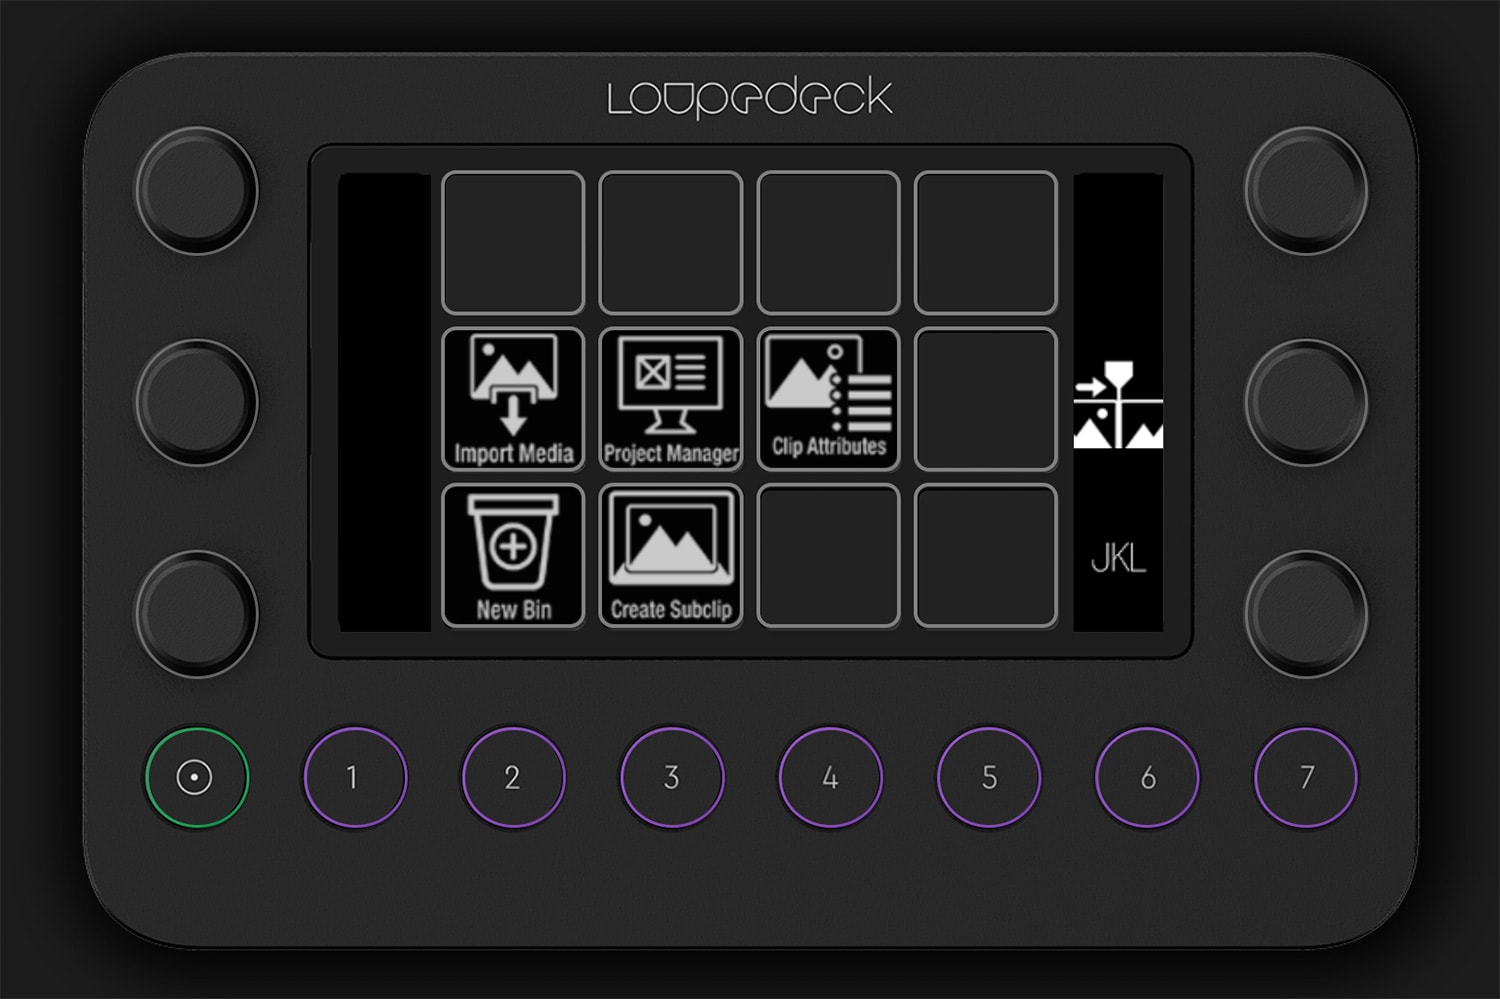
In the Media tab, I defined the most common button functions, such as Import Media, Project Manager, Clip Attributes, New Bin and Create Subclip. On the other hand, the knobs allow me to use JKL, scroll through the list of clips, and give colors and flags to clips. Thanks to this, almost without using the mouse, I can import specific clips or their parts, and sort and mark them properly.
EDIT
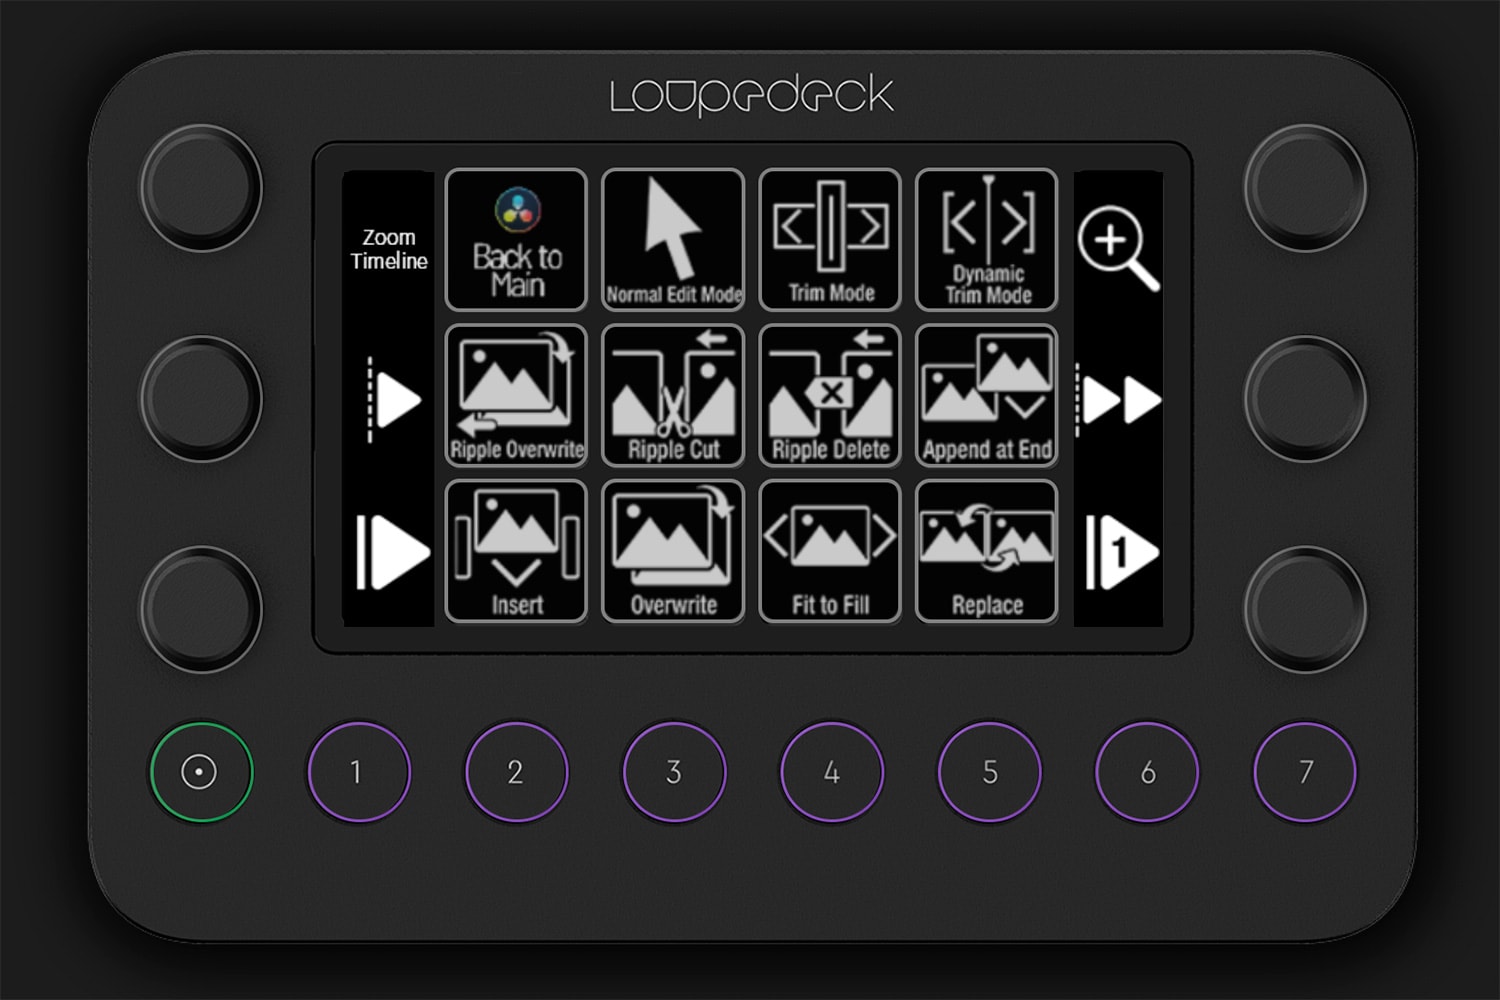
In the Edit tab, of course, there are many more defined functions than in Media. Among the buttons you can find various methods of inserting clips on the Timeline, switching between Normal, Trim or Dynamic Trim modes, various functions such as Snapping, Change Clip Speed or Add Transition and others. On the other hand, the knobs allow me to zoom the Timeline, move the Playhead by 1 frame and 1 second and the clip itself, which is extremely convenient, especially in the Trim mode.
FUSION "CONFUSION"
The Fusion tab, often referred to as Confusion for a joke, is an access to amazing functions and possibilities of creating 2D and 3D animations. Although I have used it more than once, so far I had no idea about building a profile that could speed up my work even more. Therefore, I left the basic functions such as Background, Text, Resize or Paint.
COLOR
In the Color tab, we will probably most experience the fact that the profile is built on keyboard shortcuts, and not thanks to API access. However, you have to realize that there is a conflict of interest here, because Blackmagic Design itself is a producer of peripherals such as a keyboard, but most of all color grading panels, and Loupedeck may never get this access. However, the aforementioned devices are also much more expensive than the Loupedeck, which is also a much more universal device.
Nevertheless, Live in the Color tab is also doing great. Functions that I have mapped are various options for adding nodes, skipping and resetting them, applying grading from the previous clip, preview functions, adding versions and much more. On the other hand, the knobs allow you to move between nodes, preview subsequent versions, zoom the preview or finally changing the Offset through the Printer Light.
SUMMARY
I think the price-performance ratio of the Loupedeck Live is fantastic. OK, if someone mainly uses Lightroom, perhaps the “+” is still the best solution. But, as in my case, when someone would like to improve their work also in programs such as Photoshop, DaVinci Resolve and maybe a few others, and on the other hand would not want to spend over 2000 zlotys on CT, the choice should be obvious. Live takes up much less space on the desk than “+”, is universal, and additionally supported by a pack of icons, it perfectly supports my post-production process. I don’t regret a single zloty spent!
Currently, the console can be purchased from Polish distributors, for example from the shop wzorniki.eu (link), Grupa Fine Art (link) or Foto-Plus (link)! As far as I know, there are also options to test the hardware, so there’s nothing to lose!
PS. For clarification; I bought both the console and the icon pack with my own money and it is not a text sponsored in any way. The given links to stores are also not affiliate ones, but I can recommend them based on my own, most positive experience.
EDIT: DATED 22ND NOVEMBER 2020
Shortly after the entry was published, there was first the announcement, and then the presentation of the latest version of DaVinci Resolve 17, which brought a lot of new functionalities. And one of them is extremely important from the point of view of the user of this console; now, e.g. in the Color tab, you can click on the field showing a numerical value, e.g. Saturation or Color Temperature, and change this value using the arrows on the keyboard! The up / down arrows change the value, and moving left/right we decide which row of values we change. And from here it is only a step to mapping such a function in Loupedeck Live, or adding an icon and it’s ready. You can see it on the following short video in a chill out atmosphere…
See also:
18/04/2024
19 new features in DaVinci Resolve 19
Learn about the selected 19 best new features in DaVinci Resolve 19!
04/01/2024
DaVinci Resolve quick tips #4
It's time for another post with DaVinci Resolve tips, including how to easily remove unused clips from Media…
11/11/2023
Tilta Nucleus Nano II follow focus review
Is the new Tilta Nucleus Nano II follow focus set just a cosmetic change or a completely new quality?
23/06/2023
Calibrite ColorChecker Passport Video
Check out why the Calibrite ColorChecker (Passport) Video color guide is an indispensable tool on every film…
10/02/2023
DaVinci Resolve quick tips #3
Version 18.1 of DaVinci Resolve was released, version for iPad, so I envite you for the third portion of…
25/08/2022
DaVinci Resolve quick tips #2
As it's been some time since the first entry with DaVinci Resolve tips, it's high time to publish the second…
15/07/2022
Software calibration of any monitor
Almost any display or monitor can be calibrated (profiled), in addition having a calibrator combined with a…
06/06/2022
Live streams production
Attention; please be quite on set, we are going on the air! Have you ever been thinking, how can live streams…
25/04/2022
What do I owe to photography
In this blogpost I share my thoughts about what I owe to photography as a filmmaker, and why the role of…
28/12/2021
DaVinci Resolve quick tips #1
I started a series of so-called "quick tips" about DaVinci Resolve. Hope you find them interesting, I invite…
