19 new features in DaVinci Resolve 19
The impressive, over two-hour presentation by Grant Petty, CEO of Blackmagic Design, during this year’s NAB fair brought many new products, from live production devices, cameras, to a new color correction panel and another version of DaVinci Resolve 19! A few days later, the emotions had subsided a bit, but the time allowed us to get to know the changes better and test them initially. As a result, this subjective list of the 19 most interesting new features in DaVinci Resolve 19 was created, along with their short description!
FIXED PLAYHEAD ON TIMELINE
The view of a centrally and rigidly positioned Playhead is known from other video editing programs. In DaVinci Resolve it was so far only available in the Cut tab, but now it also appears in the Edit tab. The option can be activated from the Timeline View Options menu on the left side of the toolbar.
PRECISE TRIM EDITOR IN THE PREVIEW WINDOW
Another option that was previously only available in Cut, now goes to Edit as well. It allows you to precisely move frame by frame with a preview between two clips that are connected to each other. To launch it, simply double-click between clips or select Trim Editor from the Trim menu. It is worth remembering the abbreviations “,” (comma) and “.” (dot) to move 1 frame left and right.
TRANSCRIBE MODE EDITING
In this case, we are talking about several new products, such as: detecting interlocutors in the transcription, assigning them names, trimming clips by removing words and pauses between statements, searching and replacing words or parts of words with others, or a column with a time code in the transcription window. All these new functions, together with the existing ones, seem to be a really interesting alternative to classic editing, increasing work efficiency in many situations, but unfortunately, from the perspective of a Polish editor, a big disadvantage is still the lack of support for our native language… It’s a pity.
CHANGE AUDIO CHANNELS IN INSPECTOR
Previously, to change the channel options for a given audio clip, you had to navigate to the Clip Attributes menu. Now it is possible directly in Inspector, in the File tab. Moreover, changes can also be made to multiple clips at once. Additionally, there is a visualization of the track and the ability to listen, also divided into channels. However, for now this option only works for clips still in the Media Pool, and not in the Timeline. However, the first update will most likely solve this problem, as Blackmagic Design claims that it should work in both cases.
BEZIER CURVES IN OPEN FX KEYFRAMES
Animating Open FX effects in Edit using keyframes is now also possible using Bezier curves. Obviously, “smoothed” effects usually look better!
COLORSLICE
Colorslice has appeared in the palette of tools available in the Color tab, between Curves and Color Warper. Some may already be familiar with similar tools previously available via DCTL plugins, but now it’s native. The principle of operation of Colorslice is to use the so-called six color vectors, or actually seven, because in addition to red, green, blue, yellow, cyan and magenta, there is also skin color. Within each vector (color), we can change its angle, but above all, its saturation and brightness (Density). Of course, there are also global sliders for Density, Hue and Saturation. Most importantly, this saturation is an emulation of the so-called Subtractive Saturation, which differs from the traditional Additive Saturation used standardly in Primaries and HDR palettes. Adding subtractive saturation does not increase the brightness of colors, allowing for more organic and cinematic effects.
STACKING NODES
In Project Settings you can now change the so-called Node Stacks (1 to 4) and even give them a name. This option allows you to display specific “parts” of nodes separately in the Color tab at the Clip level (e.g. Primaries, Secondaries separately, etc.), which, together with the group function, allows for transparent work, especially on very complex so-called Node Trees. The Node Stacks functionality can also be used creatively to copy and paste parts of corrections between clips.
FILM LOOK CREATOR
This new FX effect was already compared to a different, but external plug-in called Dehancer during the presentation of version 19. Unlike it, Film Look Creator does not contain ready-made presets with film tape emulation. However, its built-in options mean that you can practically build your own in one place, containing all the elements commonly perceived as the so-called movie look. You can therefore change the Color Space Transform and influence the image using numerous sliders, including: photometric exposure (Exposure), subtractive saturation (Saturation), or even introduce the so-called Bleach Bypass. In addition, options such as vignette, hallation, noise (Grain), and various formats (Filmgate) are available. Additionally, the effect includes an option that checks the applicability of the given settings in the context of the possibility of exporting to a 3D LUT table (3D LUT Compatible).
RGB MIXER CHANNEL NORMALIZATION
The RGB mixer is an underestimated tool that works great, for example, in difficult shots with a dominant light in a given color. Using it, you can benefit from, among others: Preserve Luminance option, which maintains the brightness level for all channels. However, if you wanted to make changes in a given channel without affecting the others and at the same time maintain the luminance level, you had to uncheck Preserve Luminance and manually compensate for RGB changes inside this channel. From now on, this changes thanks to the possibility of automatic normalization for each channel separately.
CLEANUP MULTIPLE CLIPS NODE GRAPH
Sometimes the structure of nodes in Color, e.g. after copying the entire correction from another clip, becomes disordered and not very transparent. This is easily remedied with the Cleanup Node Graph option, but if multiple clips are affected, the operation will need to be repeated for each one. In DaVinci Resolve 19, it is now possible to perform “cleaning” for many clips at once. Just select the appropriate clips and then right-click on the node structure field of one of them and select Cleanup Selected Node Graphs.
FACE REFINEMENT ENHACEMENTS
This tool now allows the detection of more than one person (face), but above all it allows manual tracking correction, keyframe interpolation and adds more options for face retouching.
COLOR MANAGED FUSION PREVIEW WINDOW
When using color management at the Timeline settings level, especially in the case of DaVinci WG/Intermediate as Timeline Color Space, despite various “manual” solutions, it was never 100% certain that the previews inside and outside Fusion were compatible. Now that’s about to change! Yessss…
MULTIPOLY
The new MultiPoly tool in Fusion allows you to create multiple masks and control them separately within one Node, which will greatly facilitate work, e.g. with rotoscoping. You will no longer need to create separate nodes!
UP TO 3X FASTER MAGIC MASK IN FUSION
Blackmagic Design declares that using Magic Mask in Fusion in DaVinci Resolve 19 provides up to three times better performance of this tool. Well, I guess this has to be taken as a good omen, especially since Magic Mask can be resource-intensive, but like few other tools it saves a lot of time when performing rotoscoping tasks.
INTELLITRACK
The new default tracking method in Fusion Tracker is now IntelliTrack. This is a new tracking method based on DaVinci Neural Engine, which according to Blackmagic Design is much more accurate than a “standard” point tracker. Well, it needs to be tested longer to be fully confirmed, but it is promising!
AUTOMATIC LOUDNESS CORRECTION (DUCKING)
Automatic correction of the volume of the soundtrack relative to the dialogue is one of the possibilities that everyone has probably been waiting for. Yes, it was possible to achieve this effect before using certain functions in Fairlight, but it was certainly not very simple and intuitive. In DaVinci Resolve 19 this has changed. Ducker is available in both Fairlight and Edit. The dialogue path is the Duck Source. If there is more than one, they can be combined into the so-called bus (Bus) and this is then the source. However, there can only be one path we want to influence (maybe this will change in the next updates?). The tool allows you to adjust the effect using several knobs, including: Duck Level, Lookahead, Rise Time, etc. Finally!
DIALOG SEPARATOR & MUSIC REMIXER
Both of these tools allow you to intelligently isolate and change the “components” of the audio track; in the case of Dialog Separator, we are talking about speech, as well as other background sounds, the echo effect or the so-called ambient. One note here; Dialog Separator only supports mono tracks, so the stereo track would need to be split into two separate mono tracks and the effect applied twice. In the case of Music Remixer, we are talking about layers of vocals, drums, basses, guitars and other sounds.
INTELLITRACK BASED AUDIO PANNING
The previously mentioned new tracking method can also be used in Fairlight, and the tracked people or objects can serve as a dynamically moving sound source, automatically creating a surround sound effect.
OTHER
Without going into details, Reference Fusion Composition, recovery of deleted Timelines from a backup, the possibility of purchasing a Studio license for up to one month, and the Replay option for live productions are also worth noting. Additionally, an interesting product related to DaVinci Resolve, especially for people starting their adventure with color correction, is the new Micro panel.
SUMMARY
Of course, these are not all the new features, there are definitely more of them, but some of them are reserved only for the Studio version (another reason to consider purchasing)! Also remember that at the time of publishing this entry, DR19 is in beta version, so various types of operational instabilities may occur. For this reason, working with specific client projects is already risky. The first update will probably appear in two or three weeks, and then the next ones. And the constant advice in every situation of this type; please make a copy of your database before upgrading as once it has been converted to support version 19 there is no way to go back to 18.6.
All the new products presented are another addition to the amazing range of tools already available in DaVinci Resolve, so I encourage you to also check out other entries in the “Quick Tips” series. And of course, if anyone would like to expand their knowledge during individual classes, you are welcome, more information here.
DaVinci Resolve quick tips #4
Last year, somewhat surprisingly, Blackmagic Design released version 18.5 instead of 19, which after leaving the beta was then updated to 18.6. The changes in the program this time did not involve the introduction of many new functions, but focused on performance, both in the context of existing modules and the significantly improved ability to work collaboratively in the cloud. It’s time to invite you to another portion of tips from the “Quick Tip” series!
EASY TO DELETE UNUSED CLIPS FROM MEDIA POOL
This is one of those new features that came with version 18.6 and it really makes life easier! The editing process can sometimes be… turbulent, and a lot of clips, photos, etc. appear in the Media Pool and do not end up in the Timeline. To organize the entire project before archiving or sending it, e.g. for color correction, you could previously use the Smart Filter function, but now it is much simpler, even trivial. Well, in the Media Pool menu (three dots) there is an option Remove Unused Clips… The algorithm takes into account all Timelines, including, among others: Compound Clips, Fusion Compositions, etc., and the entire operation, depending on the complexity of the project, may take up to several minutes. And that’s it!
CLEVER ACTION OF INSTANCE NODE IN FUSION
Work in the Fusion tab is node based, whose dense grid often scares and discourages novice users. However, such a system has many advantages. For example, by developing your advanced visual effect or animation, you can quickly come to a situation where, for various reasons, there is a need to use certain values (and possibly change them) in different places at the same time. No problem with Fusion! Here are the possibilities:
– another connection of the output of a given node and using it in an unchanged form, which is convenient, because all changes are made only in one node, although it is not possible to change between outputs,
– copying and pasting a copy of a node (Ctrl + C / Ctrl + V), which of course gives you the option to change any parameter, but it involves controlling all parameters (including those that have not been changed) within this new node separately,
– or copy and paste the so-called node instance (Ctrl + C / Ctrl + Shift + V), which also gives you the ability to change any parameter, but leaves the rest to be controlled by the “parent” node.
To make it more clear; after copying a node instance, e.g. Text1, an Instance_Text1 node is created and connected to it, as evidenced by a thin green line between them. You can also see it by opening the Inspector window, where the values of individual parameters are placed in special green frames. This connection consists in the fact that if, for example, the size of the text (Size) in Text1 is changed, Size in Instance_Text1 will also automatically adopt this value, and vice versa. This will happen until the given parameter is detached from its parent, which can be obtained by the Deinstance option (right mouse button next to the given parameter). Instance node gives many clever possibilities to speed up work, especially when the composition is to be saved for reuse in the form of a macro.
It is worth mentioning that the Expression function can also be used to combine the parameter values of different nodes, but it has a much wider application, so we will talk about it another time.
DOUBLE TIMELINE TO MAKE YOUR EDIT FASTER?
An extremely important beginning of the film editing process is always the proper selection of materials when importing into the Media Pool. In the classic way, the editor prepares an appropriate and logical structure of directories and places clips (or even sub-clips) in them, and only then begins to arrange them on the “main” Timeline. But why not go a step further and… first create separate Timelines for each directory, arranging materials on them at “different levels” depending on their “usefulness”, that is, e.g. on the lowest track 1 the clips, which only “possibly” can be added to the final edit, at the highest track 3 those, that are the best and must be included, and on track 2 those in between. This is, of course, only one way of the selection. This approach allows you however to use the possibility of adding a second Timeline (or possibly additional ones) to the interface during editing, and thus quickly switching between active Timelines and dragging clips to the “main” Timeline, which will potentially significantly speed up the entire editing process. How to do it?
In the Edit tab, at the height of the toolbar such as Selection Mode, Trim Edit Mode etc. on the left side there is the Timeline View Options icon. After clicking it, a menu opens, where one of the options is Stacked Timelines. It allows you to add additional tabs, i.e. Timelines (icon with “+”). There you can open Timelines created based on Media Pool directories. Importantly, Stacked Timelines also enables another option to add Timeline, but not as a tab, but as a second (next) Timeline visible simultaneously below the current one (this time the icon at the same height of the interface, but quite to the right, also with “+”). This is where you can open the “main” Timeline. This arrangement allows you to quickly switch between Timeline tabs from the Media Pool and drag the materials below to the “main” Timeline.
Is this an ideal way to speed up assembly? It certainly offers a lot of possibilities and is certainly worth trying, but in the end, the most important thing is the individual preferences of the editor!
MISSING CLIPS BY INDIVIDUAL CLIPS RENDER
Quite often a question arises on forums about the lack of some clips after rendering with the “Individual clips” option (as a reminder, Single clip means one file with “all” clips, and Individual clips means separate files). In the Deliver tab, just below the mentioned Single/Individual options, there are three tabs for Video, Audio and File settings. It seems that many people somehow do not notice them, because in the File tab you can make settings for the file(s). When rendering Individual clips and Filename uses: Source name in the File tab, different clips from the same source clip due to the same name will simply be overwritten. Just check Use unique filenames and that’s it!
Tilta Nucleus Nano II follow focus review
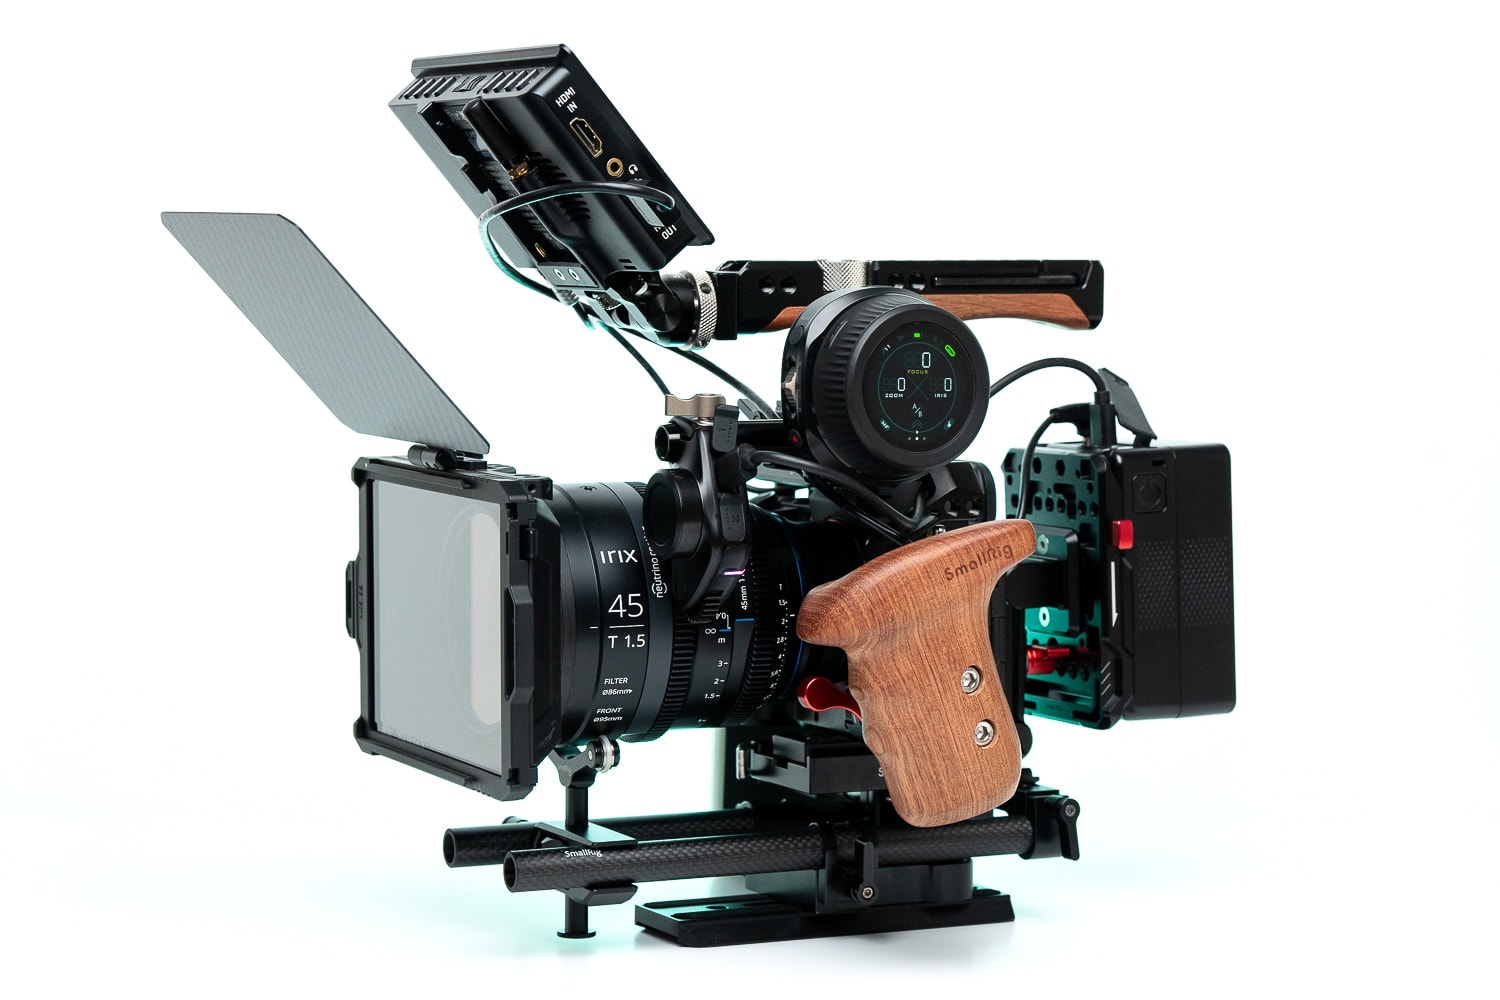
When Tilta presented the Nucleus Nano wireless follow focus set in 2018 as a more affordable alternative to the larger Nucleus M, it immediately gained popularity among creators who valued using manual film lenses while having a slightly smaller budget. Both the knob and the drive, thanks to their compact structure, could be used directly on the camera or gimbal, or classically together with the preview monitor when the focus puller was operating. In turn, the torque of the drive was nominally sufficient for use with most lenses. However, no products are perfect and Nucleus Nano also had its problems. Is the answer to them Nucleus Nano II, a model presented in spring this year, which is now also going on sale in Poland? It so happens that the original Nano has been used on Kaktus.studio sets for the last two years, while the new one has only been used for two weeks, but after such a short time one can be tempted to answer that it not only solves the problems of its predecessor, but also brings new quality! First things first.
BUILD QUALITY AND DESIGN
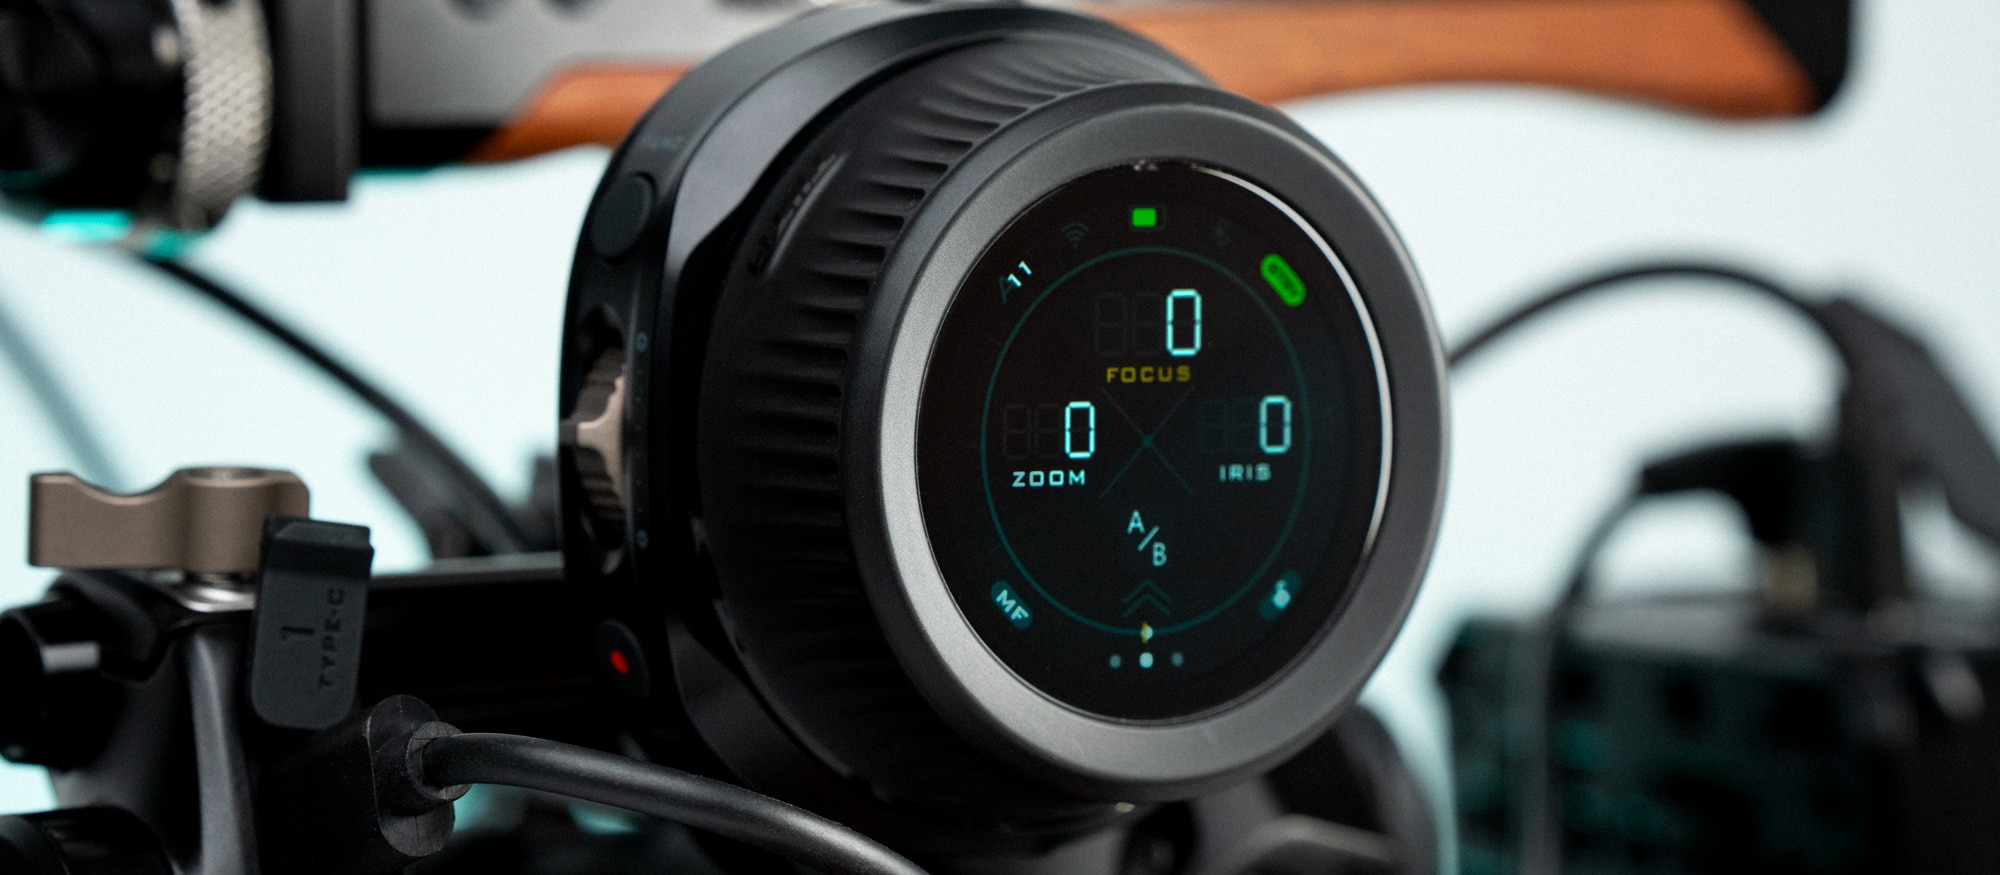
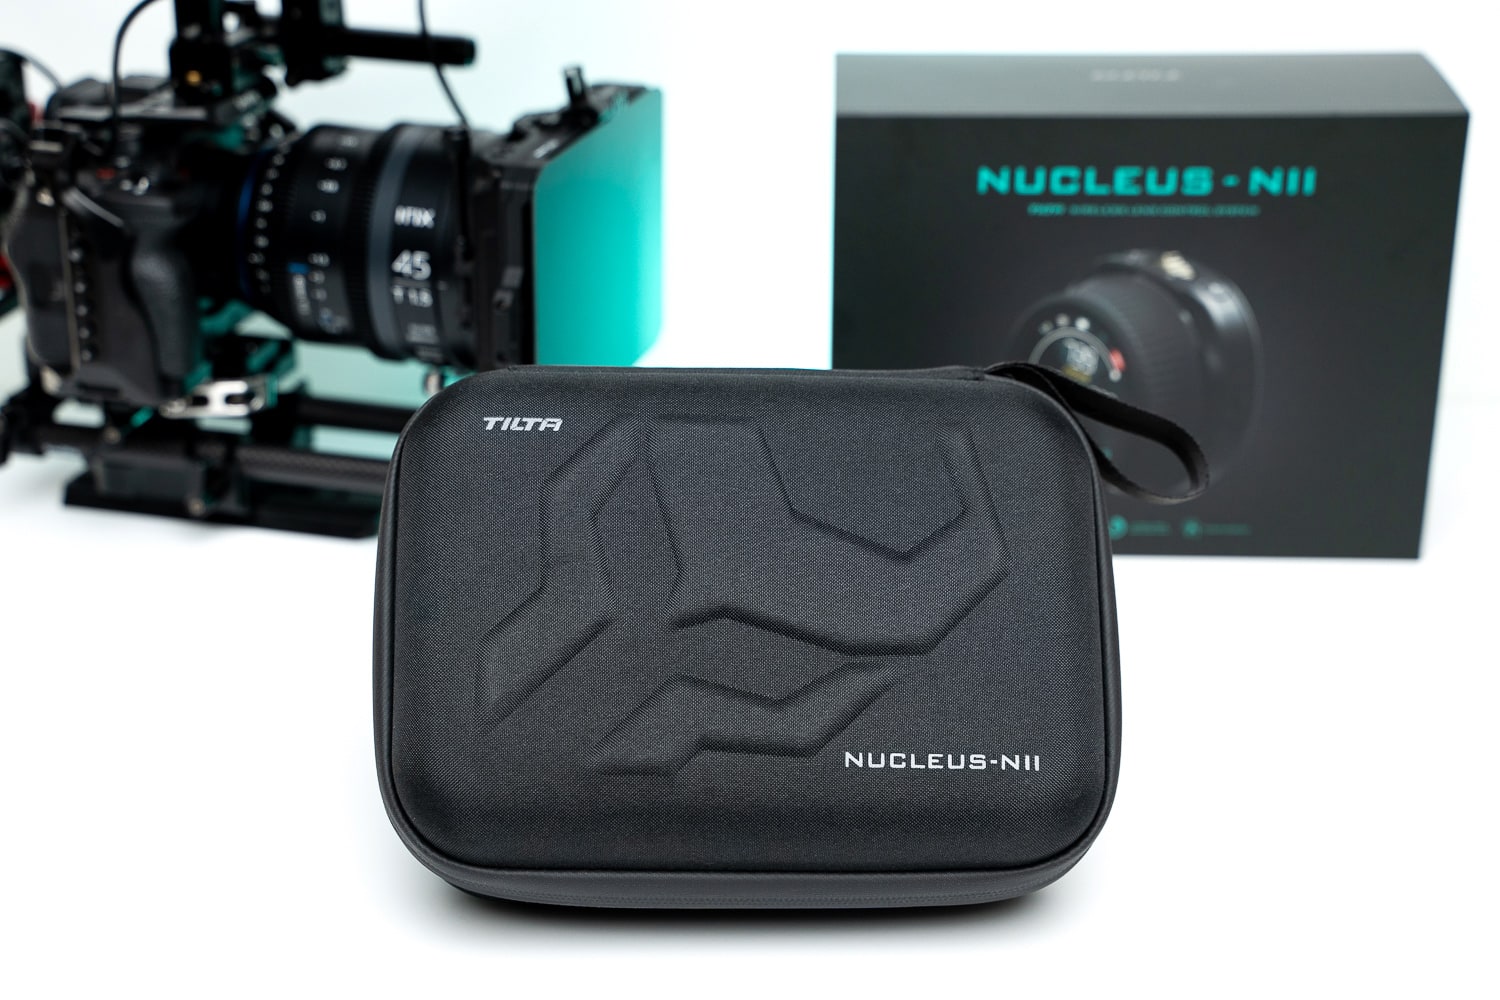
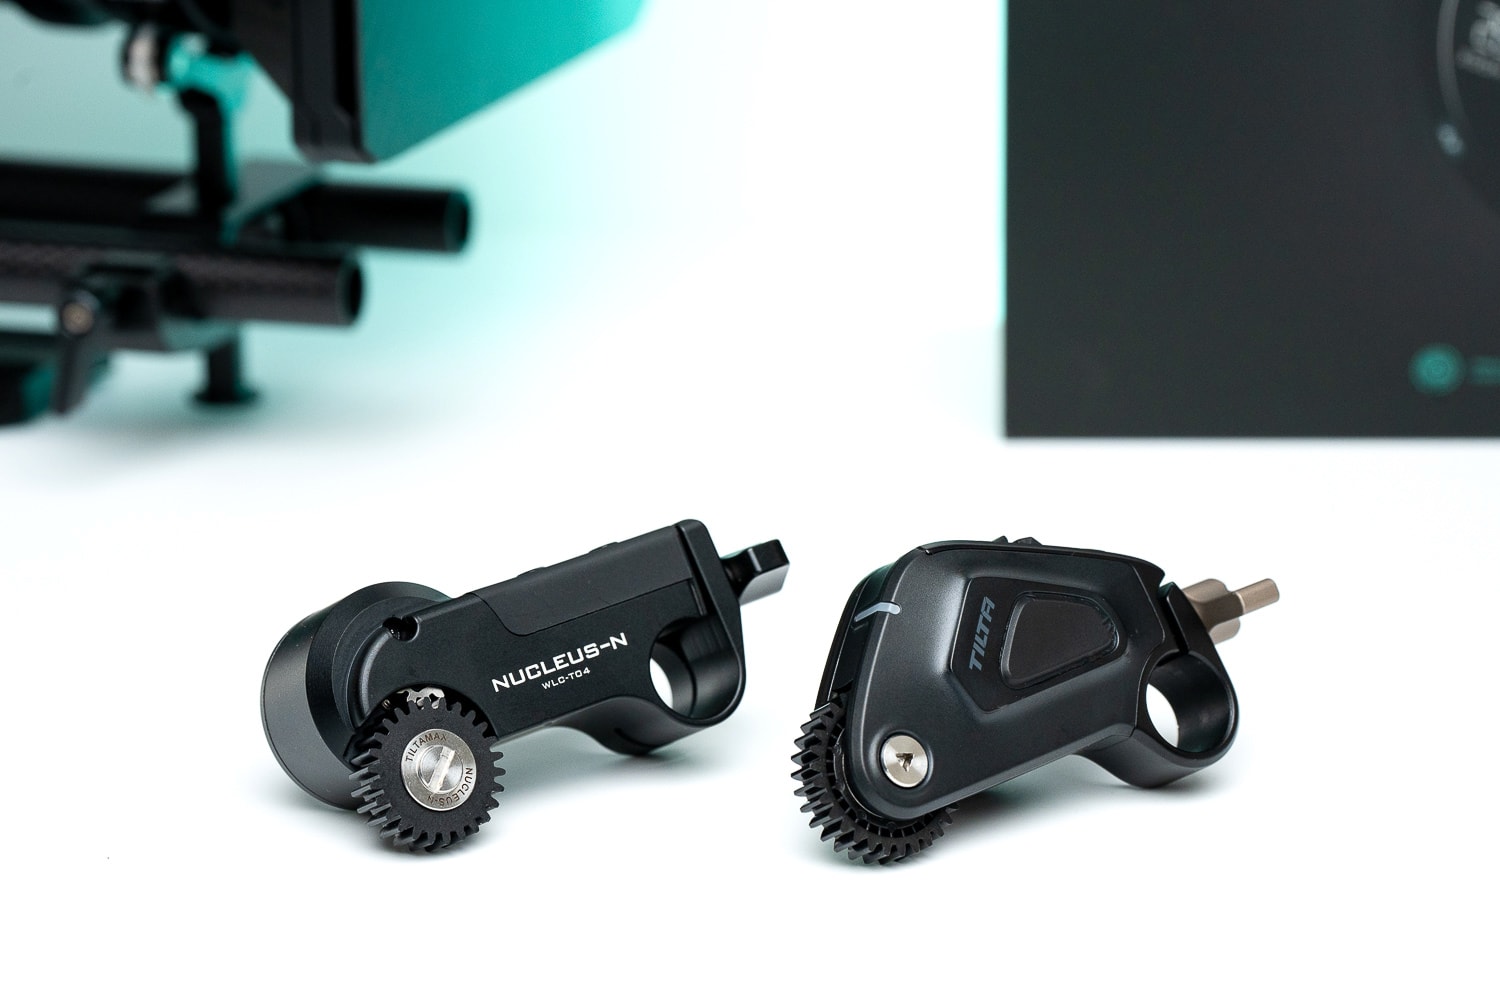
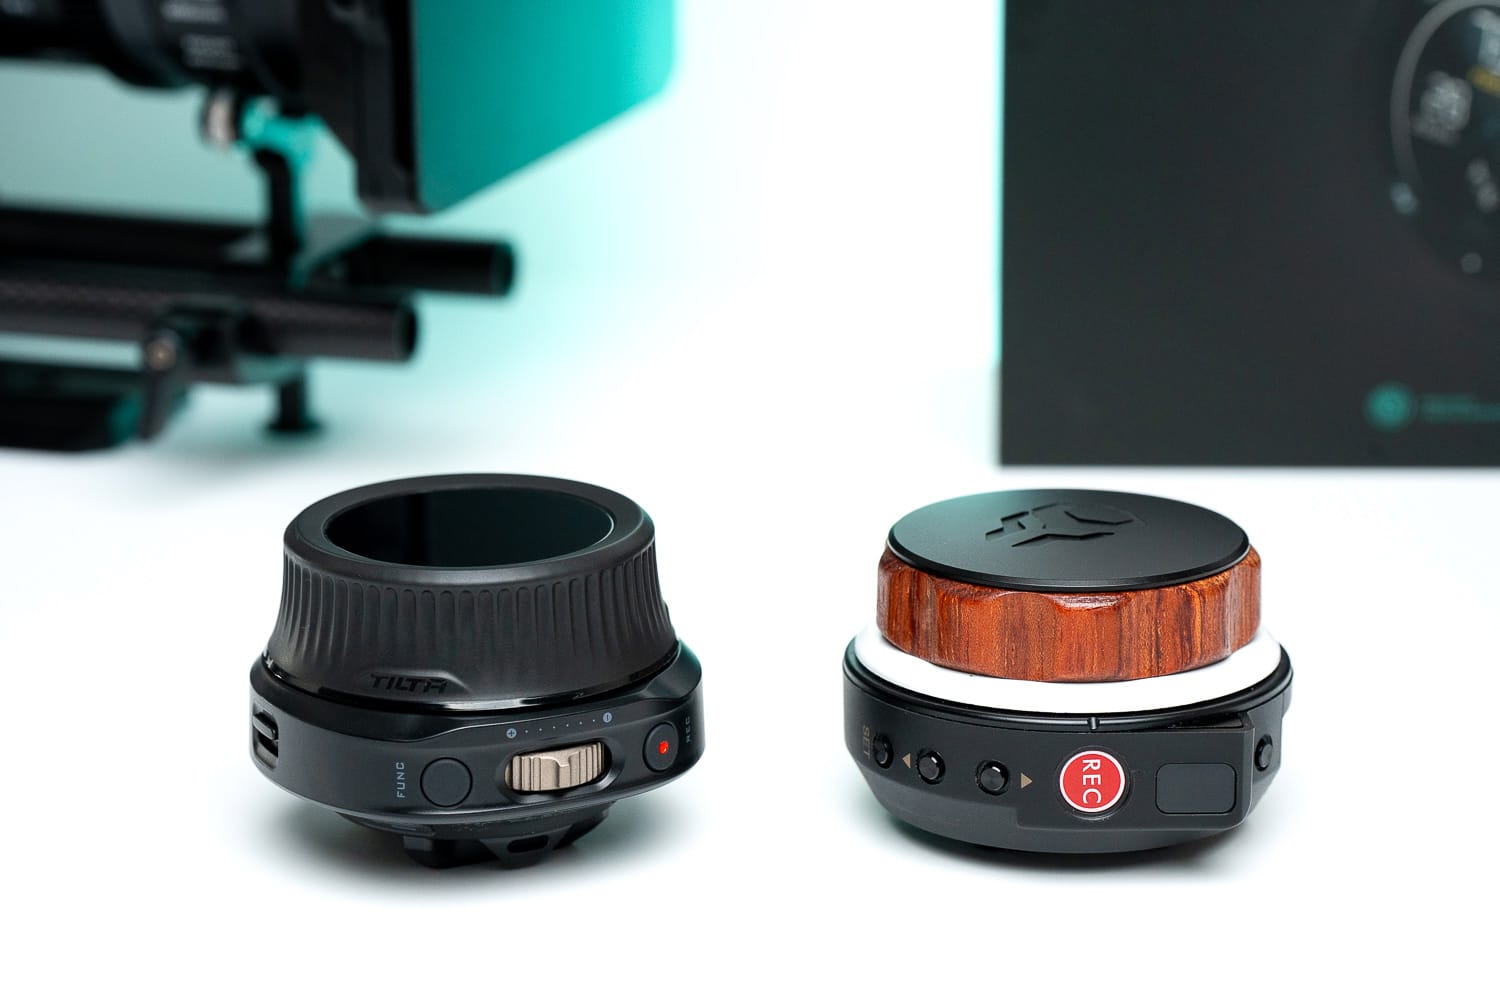
After removing the product from the protective case, the first impressions are very positive; both the drive and the knob seem to be well-made, solid and elegant. The drive, perhaps slightly smaller than the previous one, above all, no longer has an LED display, but has a physical button, a small lamp indicating the function and a knob allowing the gear to be rotated (0.8 m). And what is very important, instead of the problematic Micro USB port, it has two USB-C ports.
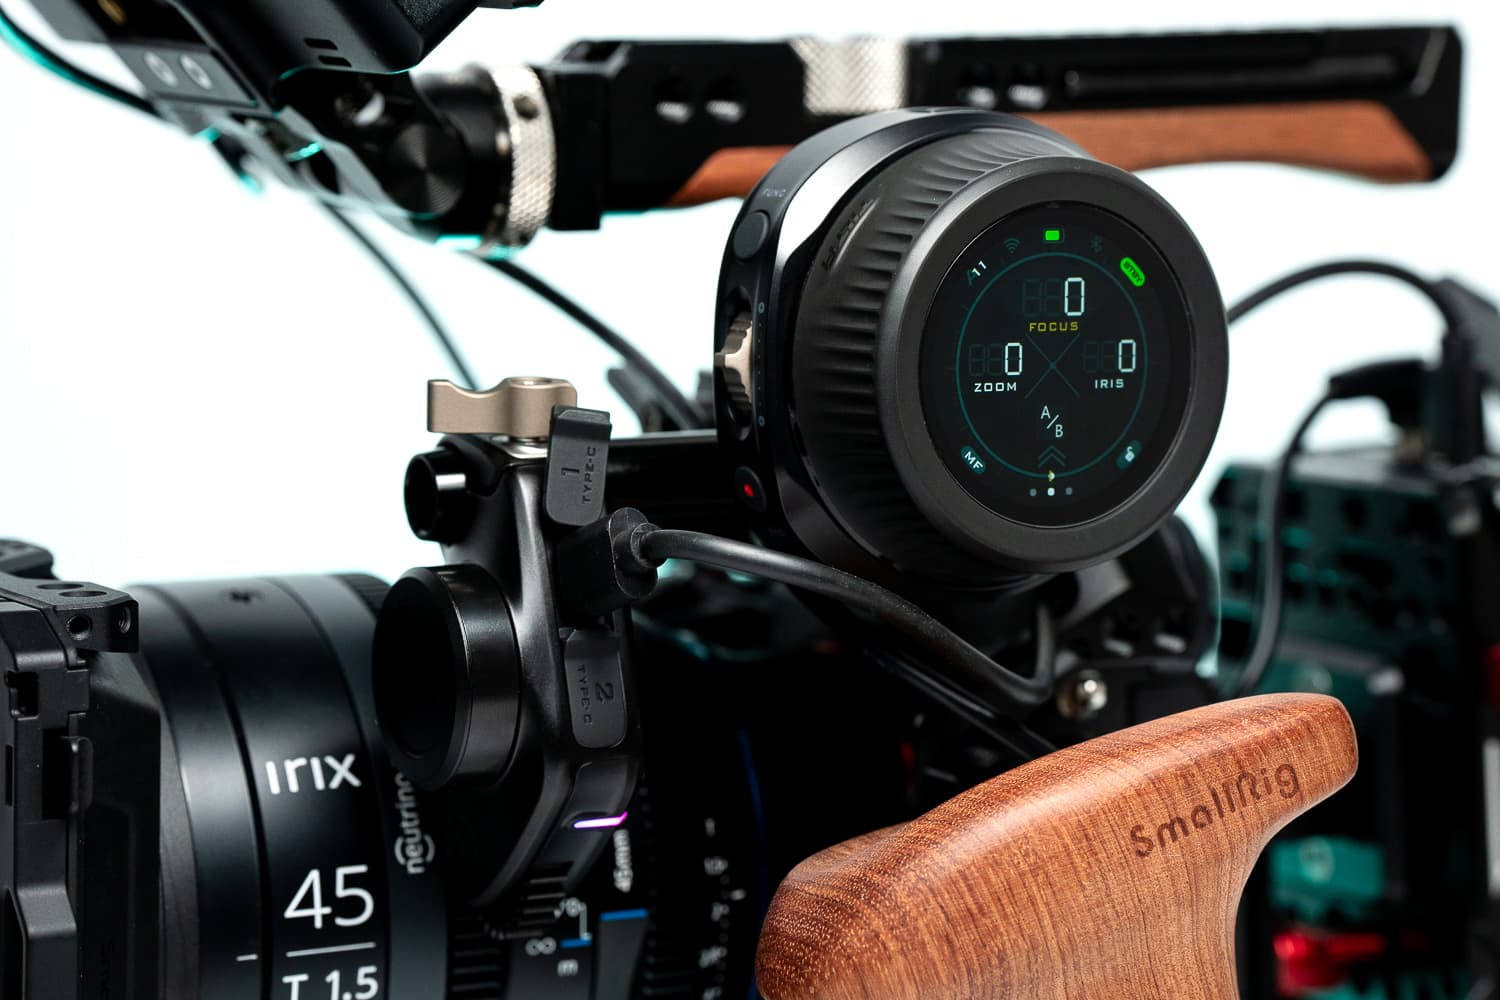
However, much bigger differences concern the knob. Although the new model has similar physical dimensions, it has black elements instead of wood, does not have a small white rim to mark markers and, above all, has a large touch screen from which you can control various functions of the device. The replaceable battery, which is now built-in, has also been abandoned. Additionally, there is a USB-C port on the knob, two, or actually three, physical buttons, and the back mount uses the popular NATO rail solution.
Additionally, the case includes a 15 mm shaft with a cage mount, a short USB-C – USB-C cable and an adjustable strap with teeth for attaching to photographic lenses.
NEW DRIVE
The problems I experienced when using the first version of Nano were primarily related to its power supply. Well, the Micro USB port was probably not the luckiest solution, for some reason the voltage that was eventually achieved was often only 5V, and I tried different cables and power banks. Only the purchased (and not cheap) Tilty cable and connection to the V-Lock battery allowed for higher values and, therefore, higher engine torque. However, I saw on the forum that some users still complained about working with lenses whose rims rotate with greater than usual resistance. Meanwhile, the new drive, according to the manufacturer, offers as much as five times more torque. It’s hard to check it objectively, but now you can even adjust the level of this “power” in the menu available on the knob, and I can say that even at the lowest level the engine works perfectly with Irix Cine lenses. Using the included USB-C – USB-C cable, higher voltage can be easily obtained from power banks or V-Lock batteries. The drive is even equipped with two USB-C ports, one of which can transmit voltage to a possible next drive.
Other users of the first Nano also indicated that after prolonged use, the brightness of the display decreased, making it impossible to read it and thus to set the appropriate communication channel. In Nano II, there is no display and the communication channel is selected via the dial menu. There is a light on the engine that indicates various functions, including: four operating modes: purple – focus, blue – zoom, green – aperture and yellow – other, a function probably intended to support the variable filters of the Tilta Mirage matte box.
Another problem, honestly I don’t know if it resulted from the operation of the drive or the knob, was the fact that both elements could not be located right next to each other, because then the set simply stopped working. This was frustrating, especially when shooting manually, when the knob mounted on the camera could necessarily be close to the engine. This problem no longer occurs in the new Nano II.
Finally, it is worth mentioning that there is a knob on the engine that allows you to move the gear, which makes it easier to adjust during installation, and a button that activates the pairing function with the knob, changes the operating mode or is ready to update the software.
NEW FOCUS WHEEL (KNOB)
It’s hard to say that the focus wheel of the previous Nucles Nano caused any specific problems, but most users will probably agree that the choice of a rather unusual battery for power supply and its charging were not among the advantages of the device. You can also complain about the rather narrow white rim for marking markers, or the unusual mounting that requires a special adapter… What does the Nucleus Nano II focus wheel offer? It turns out that in this case it is not even entirely precise, because it can control even two selected functions, e.g. focus and aperture (of course, with two motors)! Here are its most important features:
- built-in battery that allows operation for 20 hours (according to the manufacturer, in my opinion it’s more like 9-10 hours), with the possibility of quick charging via the USB-C port,
bright touch screen with access to many device functions (more on this later), - function button, which, among others, starts lens calibration or adds a marker,
- function button to start and stop recording,
- a button that turns on/off the physical knob adjustment limits,
- movable button allowing you to control the second drive,
- mounting to the NATO rail on the back of the knob.
The new Nucleus Nano allows you to forget about unusual batteries and their charger, fully charging the internal battery allows you to use Nucleus practically throughout the entire shooting day. Additionally, the touch screen indicates the charge level, and thanks to the PD Fast Charging function, it can be instantly refilled during a break.
The touch menu provides a whole host of functions that were not available before, including the previously mentioned engine torque adjustment. It’s hard to mention all of them here, I haven’t tested all of them, not all of them seem to work anymore and this will probably change with the next software updates, but it is definitely worth emphasizing the following:
- possibility of marking with “electronic” markers; when crossing a given marker and changing the position of the knob, a vibration is felt (also with adjustable strength), which makes sharpening much easier for operators working alone,
- possibility of marking the range with hard limits, which in the case of some lenses allows for more smooth changes, e.g. focus,
- ability to change the direction of the knob,
- possibility of, among others: start/stop recording and change aperture, ISO and shutter for selected camera/camcorder models,
- ability to remember calibration parameters for specific lenses,
- ability to change display rotation, brightness and dimming time.
COMPATIBILITY
Another advantage of the new Nucleus Nano is its compatibility; According to the manufacturer, the set works with Nucleus Nano N (I tested and confirm), Nucleus Nano M, as well as with DJI RS2 and RS3, and with selected models of cameras and camcorders (list updated on the Tilta website). Additionally, another compatible product will soon be available – a special handle that allows you to attach the knob and control up to 4 drives in total.
SUMMARY
Starting from the end, i.e. from the price; At the moment, the purchase of Nucleus Nano II, the availability of which in stores is increasing, costs PLN 1,600, which is very comparable to the previous version. Taking this into account, and the fact that the new version not only solved the problems of the previous one, but also offered much more, it seems to me that this product is definitely worth recommending! Who? I think it’s mainly for those who just want to enter the world of film lenses and sharpen them manually. But even if you already have the first version, the functionality of Nano 2 and the possibility of using the previous drive as a second one is very tempting.
Calibrite ColorChecker Passport Video
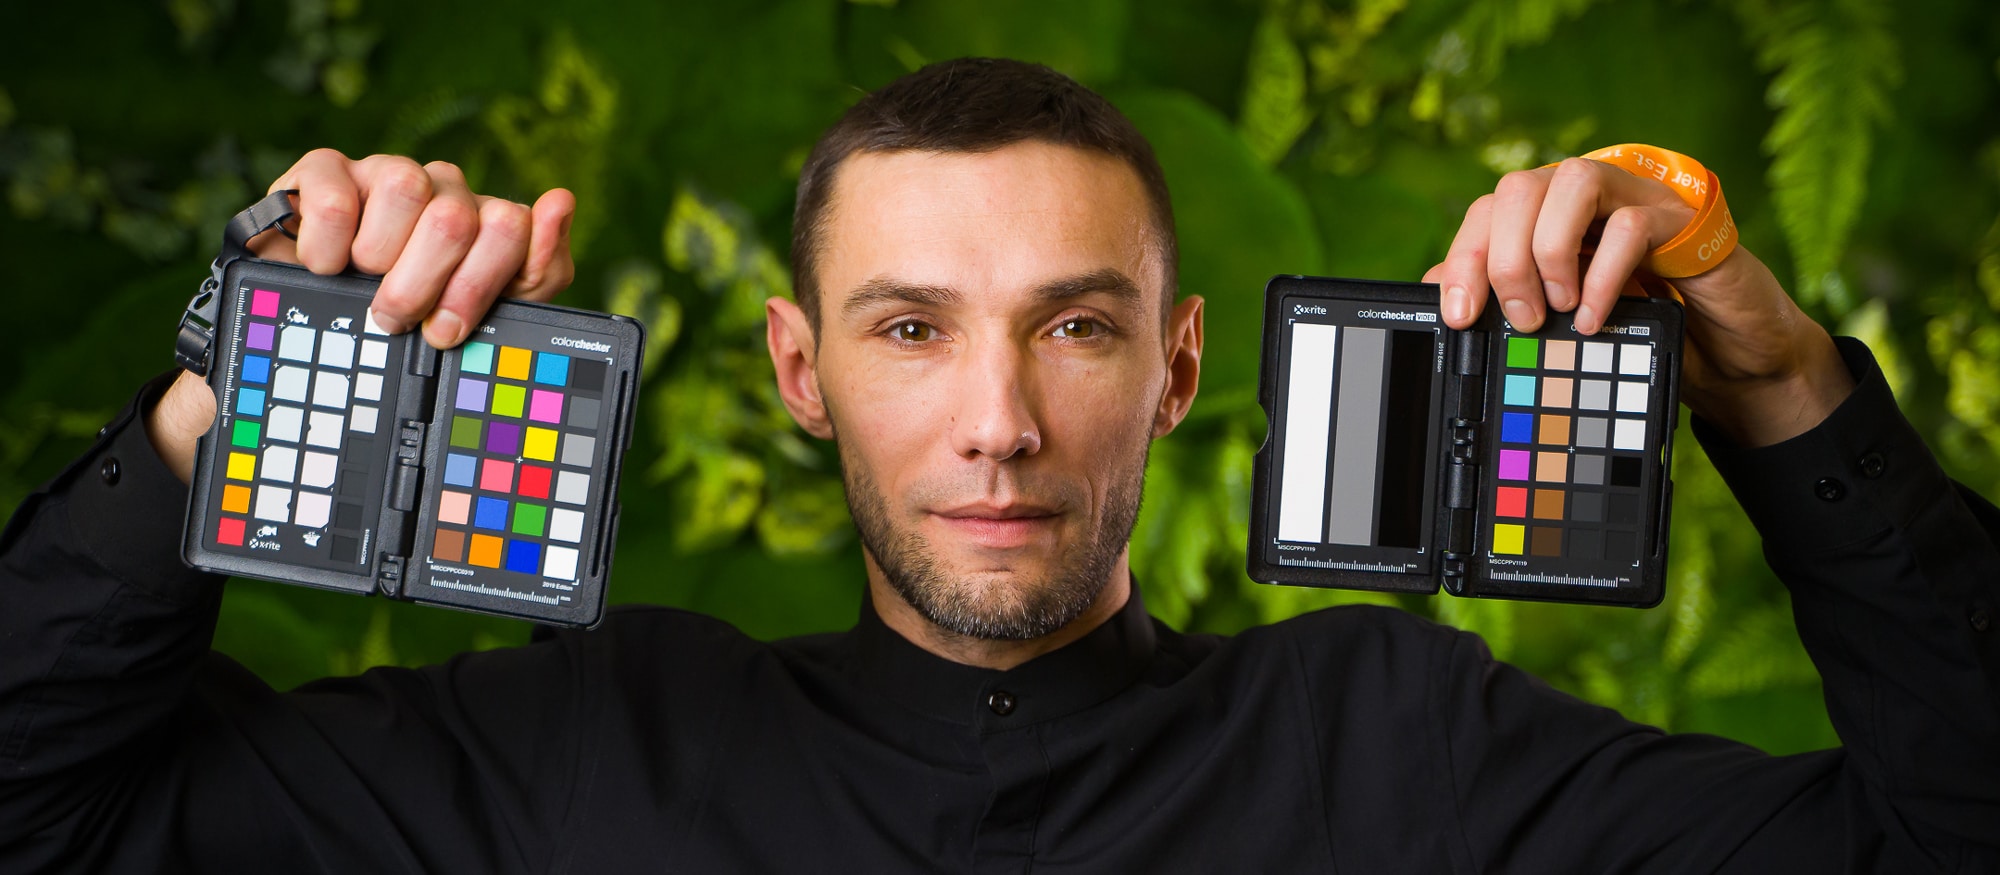
ColorChecker is a tool that should be in the arsenal of every filmmaker and photographer on set, and its value can be especially appreciated in postproduction. Conscious use of the pattern is part of a broader process called color management, which begins with the registration of the image on the camera sensor and ends with reproduction on the monitor screen or printing of the photo. There are patterns of various brands available on the market, but the most famous one, which is a kind of synonym for the color pattern, is X-Rite, and now, after changing the name, Calibrite. The Calibrite portfolio includes both devices for calibrating monitors and printers, as well as color patterns, available in various sizes and until recently dedicated separately to filmmakers and photographers. One of such patterns is ColorChecker Passport Video, which is always on the set at Kaktus.studio.
COLORCHECKER PASSPORT VIDEO
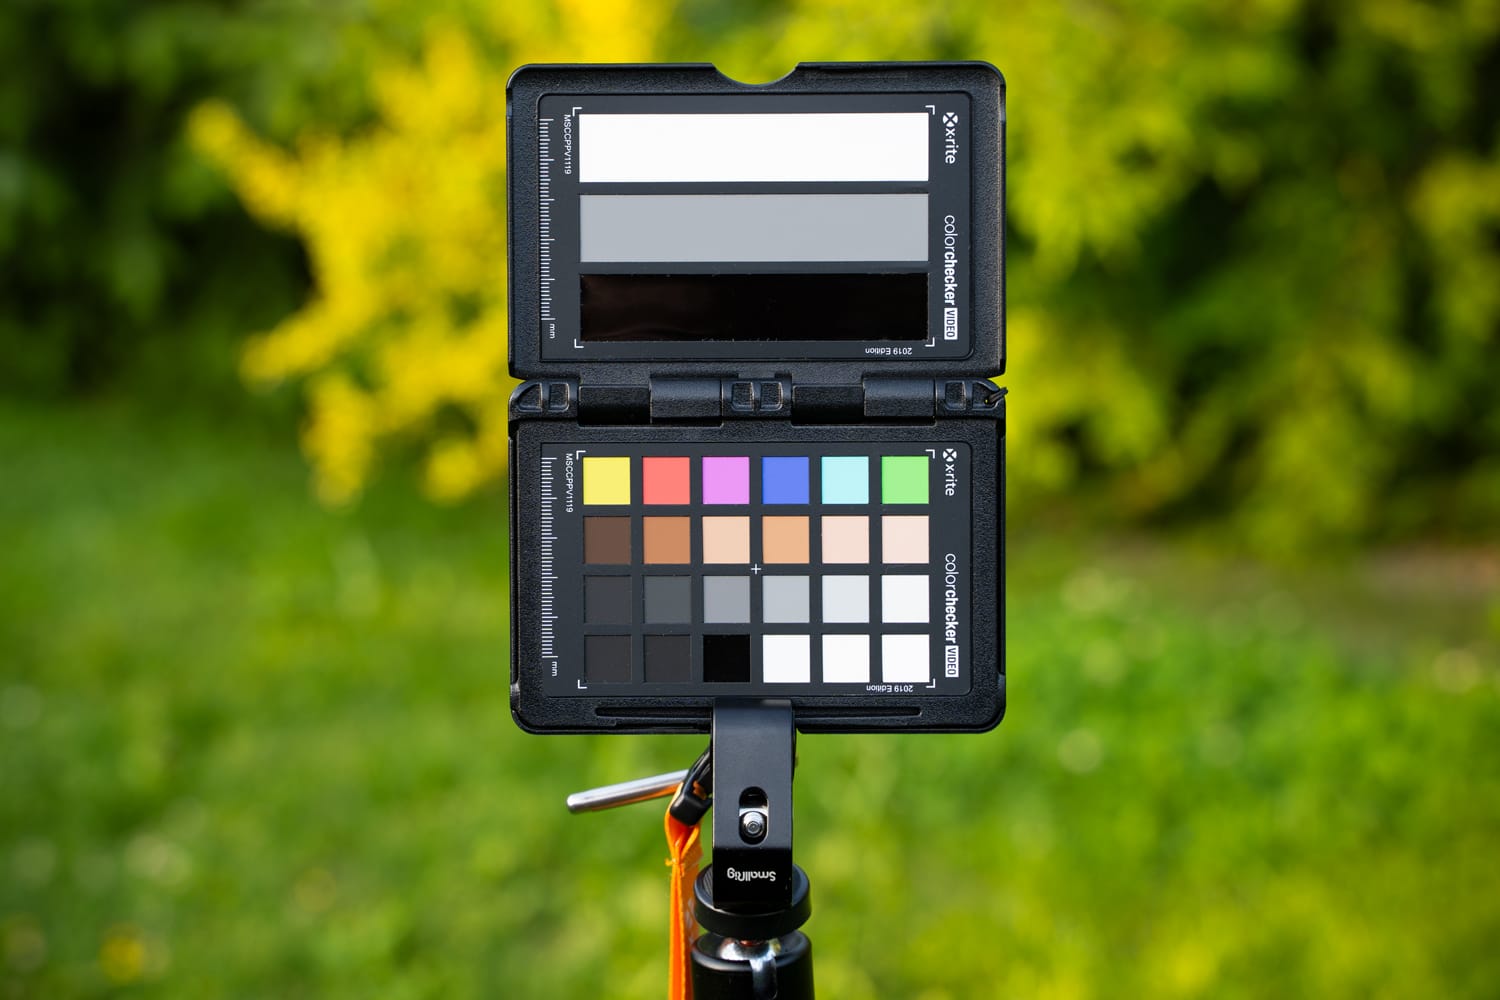
This ColorChecker, designed for filmmakers, definitely distinguishes itself from the others in size and construction. It can be said that it is a kind of closed small book with four pages with dimensions similar to… a passport (125 x 90 mm). On the one hand, this dimension is a disadvantage, because you often have to get much closer to the pattern to use it effectively, but on the other hand, it will fit in almost every pocket, so you can always have it at hand. In addition, thanks to this and no other construction, the unused pattern can be closed and protected primarily against exposure to light, which can definitely extend its life.
ColorChecker Passport Video contains four pages, each with a slightly different function:
- gray scale pattern, which contains three fields – white (90% IRE), middle gray (18% light reflection, 40 IRE) and black (approx. 0% IRE),
- white balance pattern, for setting a neutral and consistent white point,
- a color pattern with 6 chromatic tile designed for video production, 6 skin tone tile, 6 gray balance tile, and 6 highlight/shadow tile (including a high-gloss black tile for perfect color balance),
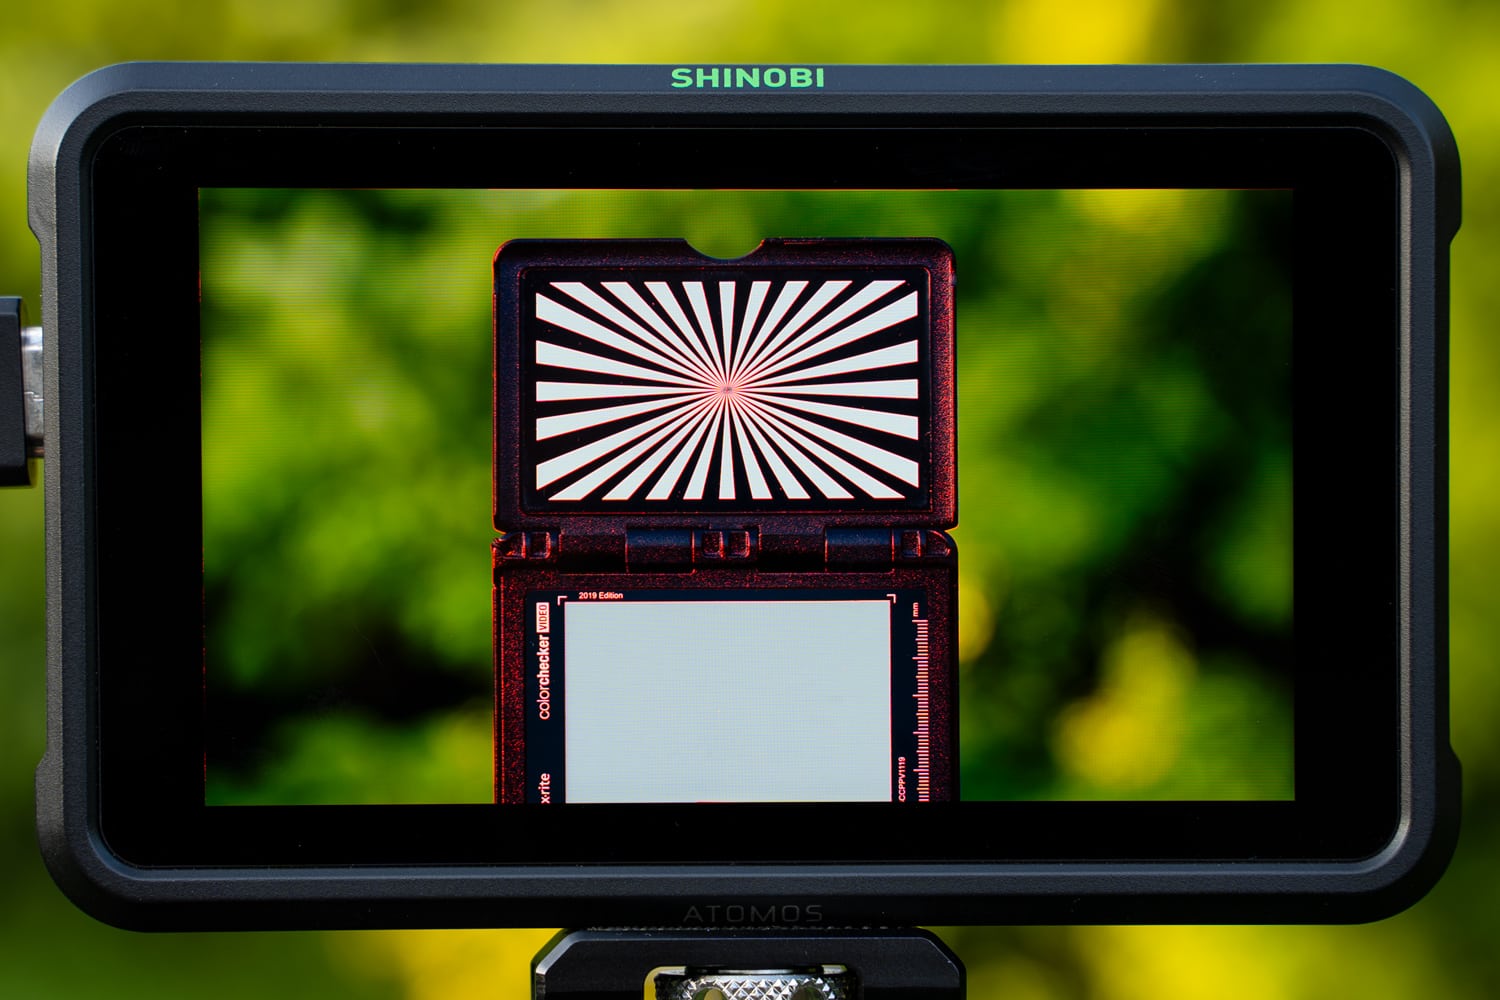
- focus pattern to assist with manual focus.
GREY SCALE PATTERN
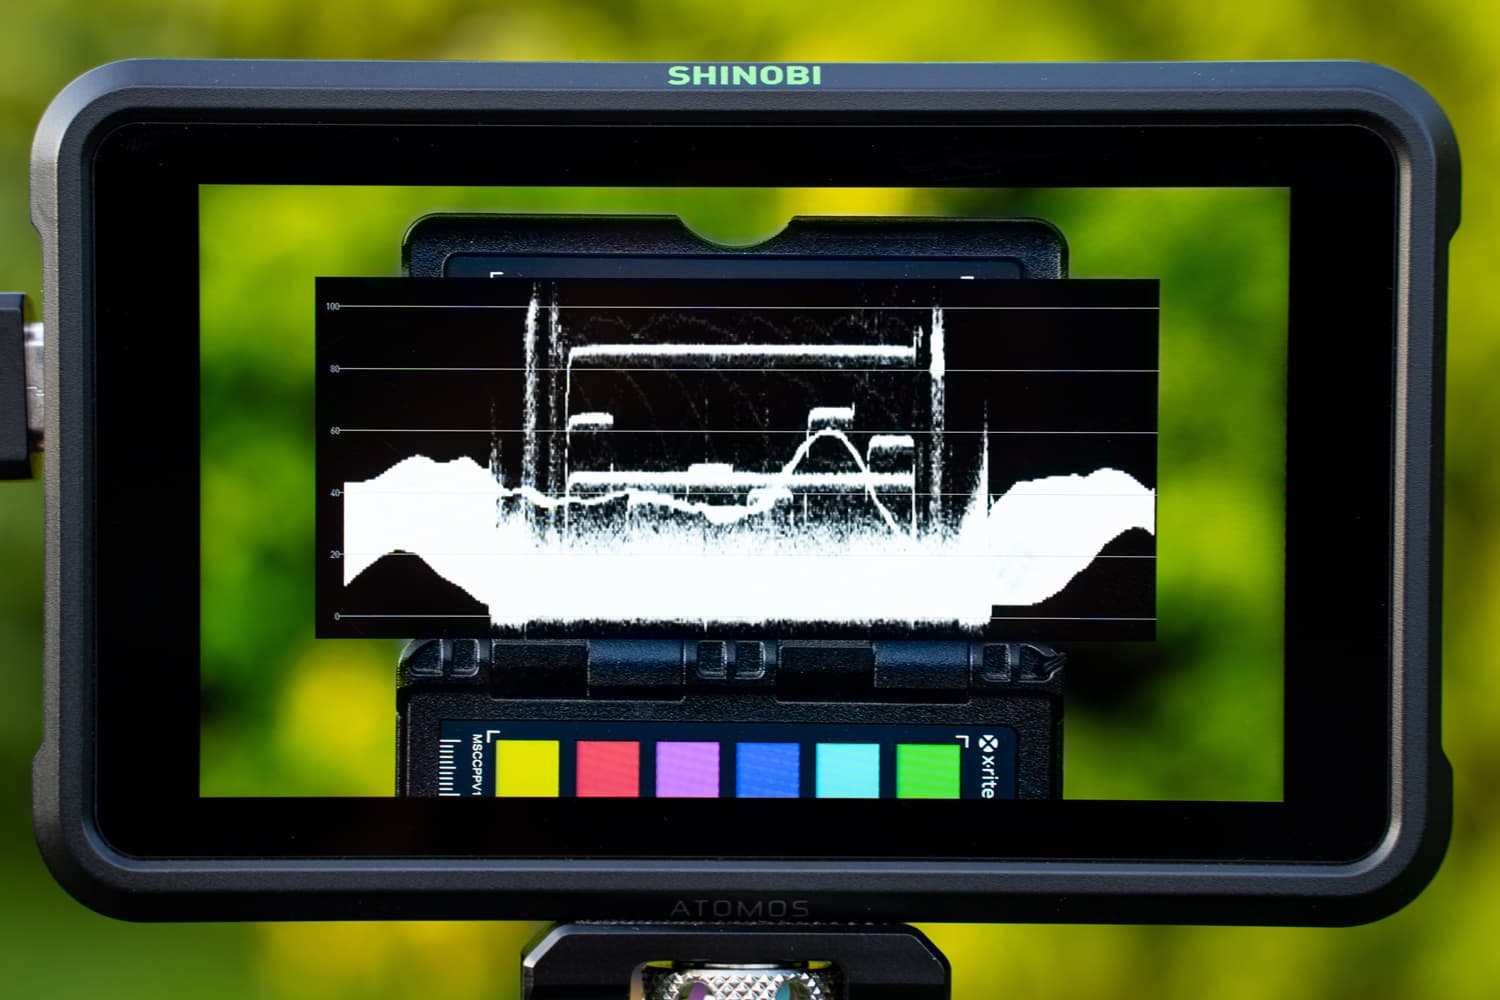
One of the basic features of a well-recorded material is its proper exposure. Of course, you can argue what the word “right” means, because it is often a creative decision. However, in most cases, it means the right value for human skin, while avoiding areas that are too dark (underexposed) and too bright (overexposed). And this is where the grayscale pattern and functions available in the camera or preview monitor, such as Waveform, Zebra or False Colors, come in handy. Also important, the reference levels of proper exposure for individual fields (white, medium gray, black) differ depending on the gamma used. For example:
- for gamma 2.4 (Rec 709), 90% white should be at about 90 IRE, middle gray at about 40 IRE, and black at least above 0 IRE,
- whereas, for Slog3 (S-Gamut3.Cine), the suggested value of white is approx. 61%, middle gray approx. 41%, and black also slightly above 0 IRE (more here). Additionally, if we want to use the ETTR method, we also need to increase the middle gray value accordingly (more about exposure and ETTR here).
And one more note about using the pattern; we place it in a place where it is affected by the same lighting that falls on the actors (or objects in the center of attention), preferably near the face.
Proper exposure is also extremely important from the point of view of post-production, because it gives much more creative possibilities to raise the “shadows” or lower the “brightness” (of course, depending on the tonal range of the camera), instead of, for example, pasting a new sky in place of an overexposed and visually uninteresting sky . In addition, the appropriate exposure value of middle gray, which is very close to the value appropriate for skin tones, allows you to avoid possible problems when using color grading of the “teal & orange” type, or LUTs based on this idea, because they change the colors above and below this value, leaving skin tones neutral.
WHITE BALANCE PATTERN
Just as an underexposed or overexposed image is irretrievable at the postproduction stage, so a possibly bad white balance can be corrected. However, in order not to waste time on it, it is worth taking care of its proper setting already on the set. A good practice, even in a controlled situation where we know the color temperature value, is to use the appropriate camera function that reads the specific value measured on the pattern, and not just enter this value manually. This is also important in the case of multi-camera implementation, because even between the same sensors at the same temperature value there are deviations. On the other hand, in the case of the so-called “run and gun”, when the conditions are not fully controlled and dynamically change, you can measure these values in the right places upfront (e.g. indoors with mixed lighting and outdoors with natural), save in the camera’s memory, and then quickly change depending from need. Then you can especially appreciate the pocket size of the Passport version, thanks to which the pattern can always be at hand. It is also always worth registering even a few seconds of an image with a pattern for possible use during post-production.
Someone will say that theoretically you can set the white balance on a white sheet, but it’s not that easy. A white piece of paper may seem white to us because that’s how the human brain works, telling us that it must be white. In fact, it often contains slight discoloration, so the reading is no longer accurate. The production of a truly neutral white balance card is a demanding technological process, but it guarantees certain effects. However, thanks to it, we can guarantee ourselves the basis for perfect color reproduction when it is especially important, or at least a good neutral starting point when we want to achieve a more imaginary look.
COLOR PATTERNS
There are basically three types of fields in this tab:
- 6 fields with gray balance and 6 fields for highlights and shadows (including a high-gloss black field), which in post-production will help to adjust the contrast curve between different cameras even more precisely,
- 6 skin tone fields that will allow you to check the match with one of the typical skin tones,
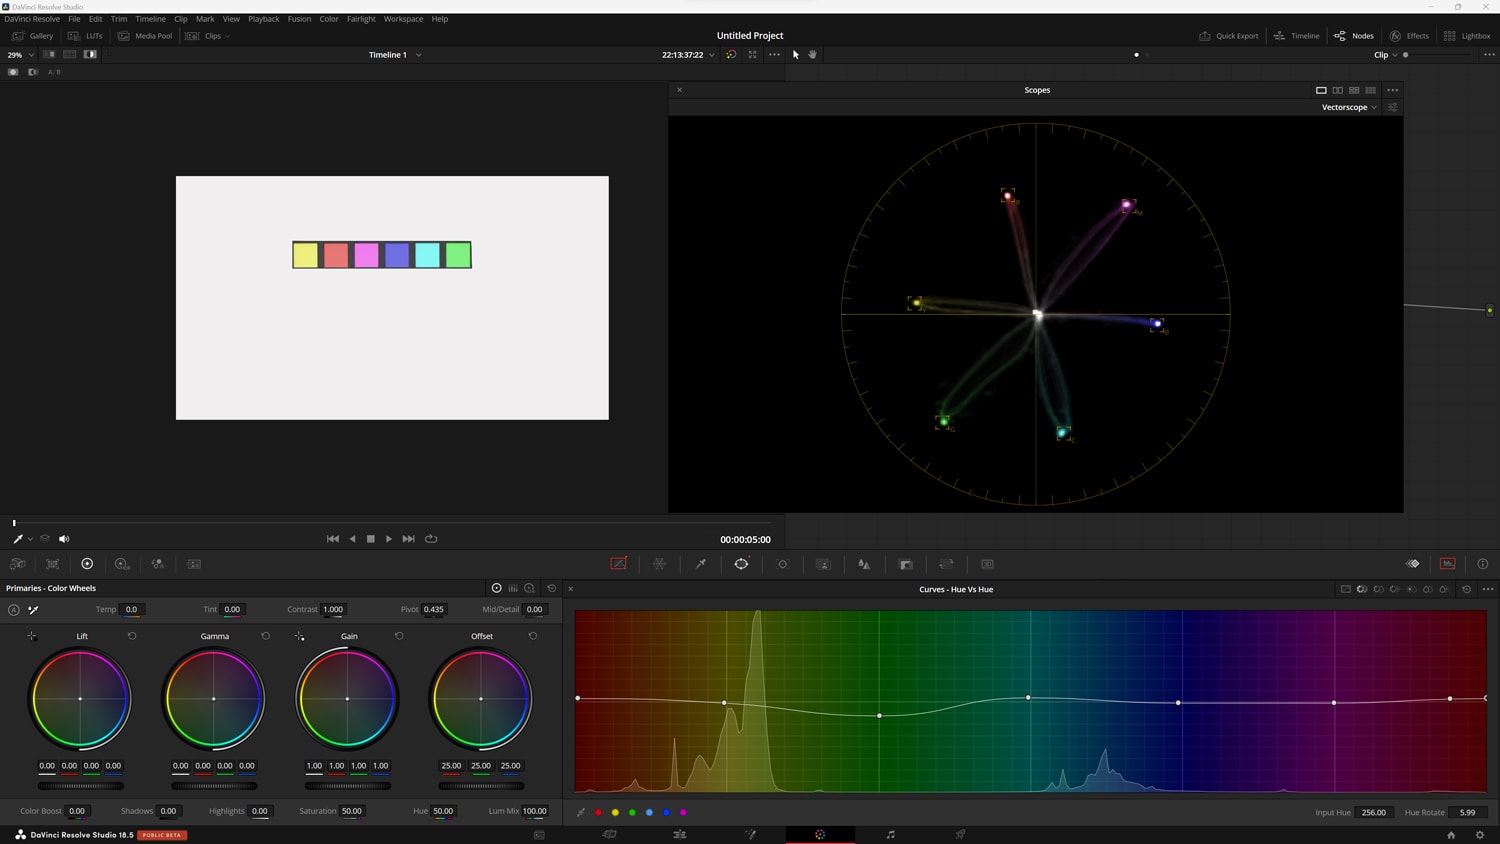
- and probably the most important – 6 chromatic fields designed for video production (they differ from those used in photography). By registering an image with a pattern, we can ensure not only an even more accurate color reproduction (the white balance is responsible only or even for the color temperature and tint, while here we have control over each of the six colors, i.e. their shade and saturation), but also a perfect match images from different cameras. In video post-production programs, such as DaVinci Resolve, there are ready-made tools for automatic adjustment using a recording with a pattern, but even better and more accurate results are achieved by manual adjustment using a mask isolating the fields area, Vectorscope graph and correction of curves affecting the hue ( Hue Vs Hue) and saturation (Hue Vs Sat) of a given color.
Whereas below a detailed tutorial by Ollie Kenchington, which, among others, also demonstrates color correction using ColorChecker in DaVinci Resolve:
MANUAL FOCUS PATTERN
The focus pattern, as the name says, makes the manual focusing process much easier, especially when combined with the Peaking function on the display or preview monitor.
COLORCHECKER PASSPORT DUO
As previously mentioned, due to the differences in reference colors for photography and film, until recently, the standards were only available in separate versions. Fortunately, recently you can get the Passport Duo version, which, at the expense of losing the focus pattern, proposes a color pattern for photography, becoming a combination of both. For more details, please refer to the Calibrite website, you can buy one for instance here at wzorniki.eu online shop.
TARGET HOLDER AND SUMMARY
Recently, another gadget has appeared – a standard holder that allows convenient use of stands to support the standard, thanks to which you can avoid the risk of touching the standard fields with your fingers during sample registration. The holder is currently included for free with the purchase of selected patterns. Moving smoothly to the summary; ColorChecker Passport Video, although it looks a bit like a gadget, is an extremely valuable element used during shooting and post-production. Although it does not cost the proverbial few zlotys and is not eternal, due to its workmanship, it will ensure not only the accuracy of reading and color reproduction, or proper exposure, but also properly used it can be used for many years until the pigment used does not degrade. It is worth following the Calibrite website, because promotions appear many times a year, thanks to which you can save a lot.
DaVinci Resolve quick tips #3
By the end of 2022 year Blackmagic Design first served us quite significant update of DaVinci Resolve to the version 18.1, and then released version for iPad. As we already have February, it is the highest time to catch up on the backlog and publish another portion of “Quick Tip”!
HOW TO IMPROVE THE SOUND QUALITY QUICK AND FAST?
The sound quality is obviously affected by many factors that can be discussed for hours, so let’s focus on at least a few directly related to DaVinci Resolve. So, first of all, on the set it is definitely worth recording sound also on the external recorder, such as Zoom H6, because the so-called preamps on this type of dedicated devices immediately allow you to get much better results than compared to the vast majority of cameras. However, due to concerns about the subsequent audio synchronization necessity, part of the creators give up on it. Meanwhile, in DaVinci Resolve it is trivial – in the Media tab, select both files, i.e. the video clip and the audio track from the recorder and right-click to open the menu, then select Auto Sync Audio and choose the synchronization method. From now on, the video track of this clip is linked to the audio track from the recorder.
On the other hand, at the post-production stage, we can do a lot “manually”, for example using the Equalizer or, as one of the previous entries discussed, manually removing elements at the sample level. However, it often turns out that the use of appropriate plugins not only saves a lot of time, but can also allow you to achieve really great results. In the recently released version 18.1, there are two new built-in effects, i.e. Dialogue Leveller and Voice Isolation (the latter seems to be only available in the Studio version). It must be admited that especially Voice Isolation does a great job of removing unwanted noise, while Leveller, especially with shorter statements by one person, can also save a lot of time. Certainly, both will be developed by the creators and subsequent versions will bring even better results. Finally, since we have the time of “magic” discounts, it is worth to consider two more third-party plugins:
- Waves Clarity Vx, which, like Voice Isolation, removes everything that seems not to be a human voice (works really fantastic, price about PLN 140),
- and Izotope RX10 Elements, a trimmed, but also much cheaper version of the full program, containing, apart from noise reduction, e.g. removing reverb, crackling, or minimizing the distortion effect (currently it can be found for less than PLN 500).
One more note at the end; plugins of this type can be quite heavy on the computer, so it’s worth remembering about the “Bounce” option (in the Fairlight menu at the top -> Timeline), thanks to which you can render the effects of your work to a new track, and then work only with the rest of the edit.
SCALING USER INTERFACE IN WINDOWS
Many Windows users were waiting for this! So, if someone has missed that, the last DaVinci Resolve update 18.1.1 introduced option of user interface scaling manual setting. How to do that? In the upper menu: DaVinci Resolve -> Preferences, then in the new window in User tab -> UI Settings -> UI Display Scale appear options: Auto, 100%, 150% or 200%. Little thing, but makes you happy!
EDITING VERTICAL CLIPS FOR SOCIAL MEDIA
Whether we like it or not, the amount of videos in portrait mode due to their use on social media is constantly increasing. So how to make it easier to assemble such materials in DaVinci Resolve?
First of all, set the timeline resolution properly; it is true that in Project Settings -> Master Settings -> Timeline Format -> Timeline Resolution you could select Custom and enter your own resolution before, but since version 18.1.2 there are presets (Use vertical resolution should be checked). It’s also good to know that by clicking the three dots icon in the upper right corner, you can save these settings as Save Current Setting as Preset or …Default Preset!
You can also change the timeline resolution:
- in the Cut tab – by clicking the Timeline Resolution icon in the upper right corner,
- in the Media tab or in the Edit -> Media Pool tab – by right-clicking on the Timeline file, then Timelines -> Timeline Settings and unchecking Use Project Settings at the bottom. In addition, in the Mismatched Resolution option, you can select Scale full frame with crop, so that the program automatically fills the entire space, while cutting the sides.
After setting the resolution, in the case of classically recorded clips, a very useful option may be Smart Reframe (probably appeared in version 17), available in the Edit -> Inspector tab, but only in the Studio version. There are two options to choose from; the first Auto, in which the program (Neural Engine) decides automatically what should be in the center of the vertical frame, and the second – Reference Point, where this important area for editing can be indicated manually. It’s probably best to start with Auto and then make corrections with Reference Point.
FLUENT PLAYBACK THANKS TO BLACKMAGIC PROXY GENERATOR
Smooth playback during editing of files depends on many factors, including such as the capabilities of the processor and graphics card, the size and type of files (especially due to the compression method), or the number of changes made during post-production. To prevent a choppy preview, you don’t always have to invest in more expensive equipment or limit your creative ideas right away. A good solution (if it is of course possible) may be, for example, changing the file codec during shooting from the so-called Long GOP into All-Intra (in Sony it can be XAVC SI), or already in DaVinci Resolve using Render Cache, Opimized Media or finally Proxy Files. From version 18, creating and using proxy files with the Blackmagic Proxy Generator application has become even more simple and intuitive.
The mentioned application is part of the installation package, so you just need to find and run it. For the first time, define the Watch Folder, i.e. a folder in which the program will look for original files and in which, after processing, it will place much smaller proxy files grouped in a separate Proxy subfolder. These Watch Folders can be many, and you can manage them using the buttons below: Add, Remove and Show. The additional two options are Delete Proxies and Extract Proxies. In addition to the above-mentioned, we can also choose one of the file format options (Proxy Format) and manually start file processing above. Importantly, with the processing option (Start) active, the program will automatically create proxy files each time you add more files.
Whereas in DaVinci Resolve itself, switching between original and proxy files is extremely simple. Well, in the menu Playback -> Proxy Handling we set the appropriate option; Prefer Proxies, Prefer Camera Originals, or Disable All Proxies. Additionally, Proxy files on the Timeline are marked with a small icon (camera with film negative) located next to the file name.
DaVinci Resolve quick tips #2
As it’s been some time since the first entry with DaVinci Resolve tips, and in the meantime, even another 18th version of the program has been released, it’s high time to publish the second part. So I invite you to read!
"POWER" OF POWER BINS & GRADES IN PRACTISE
Power Bins and Power Grades are one of these DaVinci Resolve options, which make both editors and colorist life easier on a daily basis. What is their purpose an how to use them?
First Power Bins, which is an option to create a special bin in Media Pool, shared across all projects within one database. Although as default it is hidden, it can be simply enabled via menu: View -> Show Power Bins. Then in Media Pool a Power Bins section with Master bin will appear. Of course you can create your own folder structure within and rename bins according to personal preferences. It is a great option for all these elements, that are often reused in the following projects, like intro and outro clips, titles or Adjustment Clips, which in Power Bins are ready to use in a very simple and quick way.
Power Bins section is always available there, where Media Pool is, whereas Power Grades is reserved only for Color Tab. So, after clicking Gallery icon on the left upper corner, two more icons appear below. The left one opens additional menu including, among other things, PowerGrade1 album. And again the most important – this album is shared across all project within this database. Right clicking you can add another albums, change their names or draging and dropping move stills between albums. Power Grades obviously is a great option to quick apply the grading from another clips, but not only. Colorist ofter use so called Fixed Node Tree, applying their own standard node structure to a clip, but making no corrections at the same time. Another example is applying nodes, or node groups prepared for some certain purpose, like Color Space Transform in case of manual color management.
REMOVING CLICKS FROM SOUNTRACK IN FAIRLIGHT
According to the research, humans have much bigger tollerance for worse image, than sound, hence you should care about it in particular. This is of course very broad subject, but this time I will take up only one problem, which is removing any kind of clicks from the soundtrack. Anyone editing footage, especially interviews, sooner or later will experience one with appearing in the background, very short, but distractive and unwanted sounds. How to fix this?
In DaVinci Resolve on the Edit page the smallest unit is one frame, but this is still relatively long time distance and making changes referring even one frame will be noticeable. Fortunately on the Fairlight page you can zoom in the soundtrack up to the samples level, and there are many of them within one frame! In addition it turns out, that manipulating them is very easy. Just click and hold left mouse key and then move left/right changing their position, which reflects loudness level. Of course if the track is stereo, you have to repeat it on the second channel. The characteristic of the cracks is usually the same – high loudness within very short period of time, therefore this method works here perfectly.
WHAT BLACKMAGIC DESIGN DECKLINK CARD IS USED FOR?
This subject is referring not exclusively to DaVinci Resolve, but Blackmagic Design has recently released new models – DeckLink Mini Monitor HD and DeckLink Mini Recorder HD, so maybe it is worth to explain what are they capable of, and for who it would be a good idea to purchase one.
So, in a shortcut Decklink is a series of PCI Express cards offering either displaying, or grabbing tv signal. The available models differ from each other in number and sort of connections, their function and signal specification, including resolution. Their possibilities shall be interested mostly for Color tab users. We all know, that both Windows and macOS are not perfect in dealing with color management of the displayed picture, whereas colorists prefer to work with a “clean” picture. And here’s where Decklink card, like DeckLink Mini Monitor 4K comes in handy; it can deliver clean signal from DaVinci Resolve directly to the monitor, surpassing operational system. There is a dedicated software, where you can make some settings, another ones are also available in DaVinci Resolve: Project Settings -> Master Settings -> Video Monitoring.
In addition it is worth to mention, that with a limited budget by using free DisplayCAL software, above mentioned card, calibration tool and at least a basic knowledge, you can calibrate your monitor by yourself for possibly most accurate work with color in DaVinci Resolve, although services of external companies specialized in this process will give even more accurate results.
FEW VERY USEFUL OPTIONS IN TEXT+
To add a simple title or caption to a video clip in the Edit window, you can of course use Text from the Effects tab, but Text + gives you much more fun. So, after dropping it on the Timeline, right-click -> Open in Fusion Page and go to Fusion. Here’s a few useful options that are available there:
- On the right side in the Inspector window and the Tools tab we have, of course, a text input field and various other options, including the ability to change the font, color, size, position, add a border or a shadow, but they all affect the text as a whole. However, by right-clicking in the mentioned input field a new window appears with various functions, among them Character Level Styling. Well, thanks to it, in the new Modifiers tab (next to Tools), you can separately change the character of individual letters or parts of text, of course, after selecting them in the preview window.
- Other interesting option, in some way similar to the previous one, is Follower, which allows you to differentiate the text animation used, e.g. change the position or fade out, in such a way, that again not the whole text is animated at once, but individual letters one after another, in an orderly or random manner, and with an appropriate delay, according to the settings from the Modifiers -> Timing tab.
- Another useful function, especially for various types of more complex inscriptions, is the possibility of using tabs; just press Tab in the text input field before a given section, and then conveniently control the position and alignment of a given tab, either from the preview window or from the Tab Spacing tab.
- And finally, the above-mentioned window with functions can be called not only in the text input field, but also near other values in the Inspector window, and Expression will appear at the bottom (it can also be called by entering the “=” sign in the value field). It may seem to be an inconspicuous option, but it gives enormous possibilities. Well, after “=” you can specify the appropriate function (e.g. time is the number of the composition frame) or by clicking on the little plus sign below and dragging with the mouse to connect to another field for entering values (e.g. when we connect the X axis with the Y, changing the values on the X axis, automatically they are also changed on the Y axis). Expressions is a topic with great potential for a separate discussion, it is worth reading about it in the DaVinci Resolve manual.
Software calibration of any monitor
A well-calibrated monitor is an indispensable element of the conscious process of graphic, photographic or film post-production, and yet still ignored by so many creators. If it is possible to understand that on the client side, color management is often a matter of personal subjective preferences, then professionals should be sure of the results of their work. It happens that the explanation is, for example, the lack of a budget for an expensive monitor. Meanwhile, virtually every display, even the one in a laptop, although only system-wide, can be calibrated! Unaware of the difference between system and hardware calibration, I refer to a separate entry on this topic, while here I will present the system calibration process of my Dell Vostro laptop and the Benq PD2500Q monitor, which also does not have the possibility of hardware calibration.
WHAT IS NECESSARY FOR SYSTEM CALIBRATION?
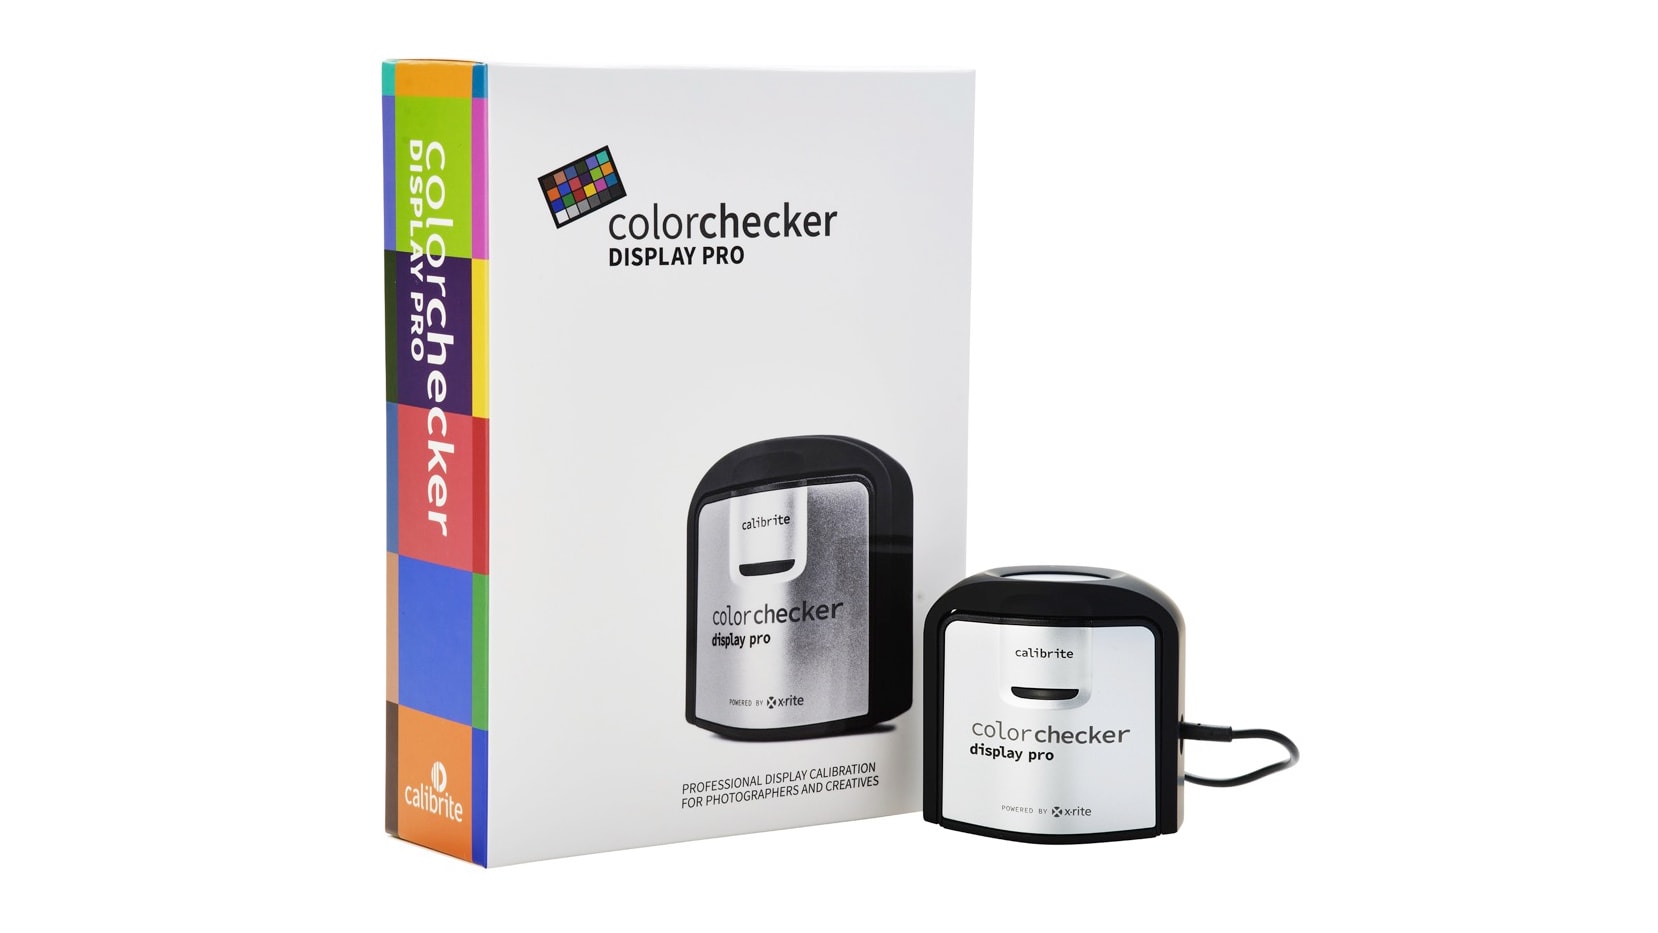
To calibrate the monitor yourself, we need a calibrator with software and a bit of knowledge about it. As usual, there are several solutions to the first issue, from those for a few hundred zlotys to… let’s say very expensive. From personal experience, however, I can recommend equipment of a Calibrite brand (formerly X-Rite). For over three years I have been using the X-Rite I1 Display Pro model (currently Calibrite Color Checker Display Pro), which is available for around a thousand zlotys. Among similar models there is also a cheaper one – Calibrite Color Checker Display, but it works only with Calibrite software, and the more expensive Calibrite Color Checker Display Plus, for displays over 1000 nits. In my opinion, it is worth choosing at least the Pro model, because if you invest in a better monitor or use other programs, such as DisplayCAL, unlike the lower model, you will still be able to use it. The aforementioned calibrator is therefore used for hardware (e.g. using BenQ’s Palette Master Element software) and system calibration, as well as for measuring e.g. the uniformity of the matrix backlight or the ambient luminance.
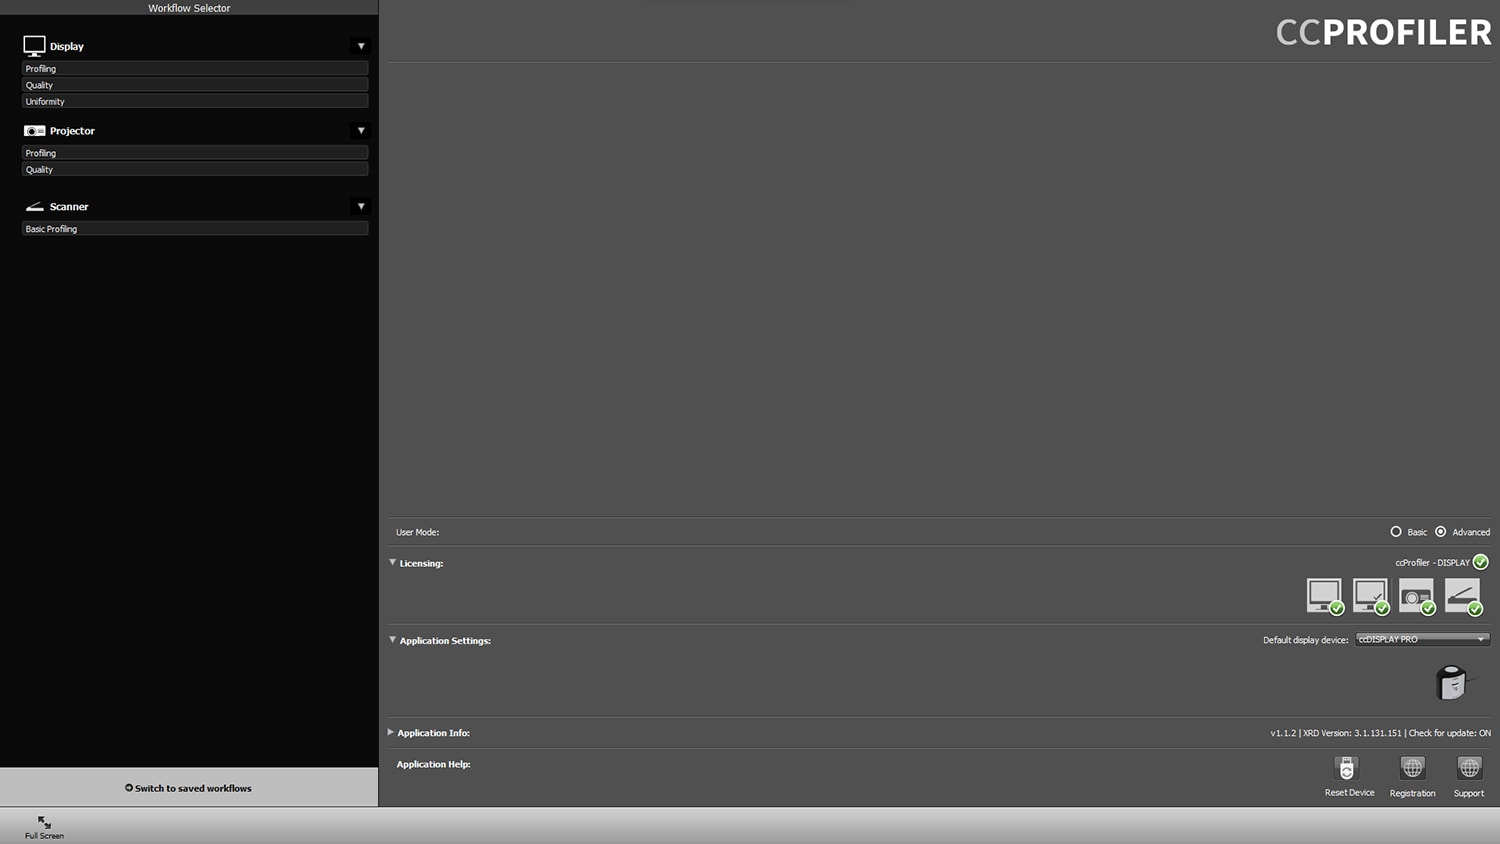
Another element is the software, which in case of Calibrite is available free of charge from the manufacturer’s website (for the Pro model it is ccProfiler). And the last element is a bit of knowledge, that I will try to provide below.
CALIBRATION PROCESS
After installing the software and connecting the calibrator to the computer, we start the calibration process (although this actually should be named monitor profiling, because after completion, unlike hardware calibration, you will get only the icc profile, however both hardware and system calibration are still referred to calibration, so I will stick to this nomenclature). As I mentioned, I will calibrate the display of my Dell Vostro laptop and the BenQ PD2500Q monitor, because the process looks identical with two exceptions. So, after launching ccProfiler on the initial screen, first we select the Advanced option on the right, and then Display -> Profilling on the top left.
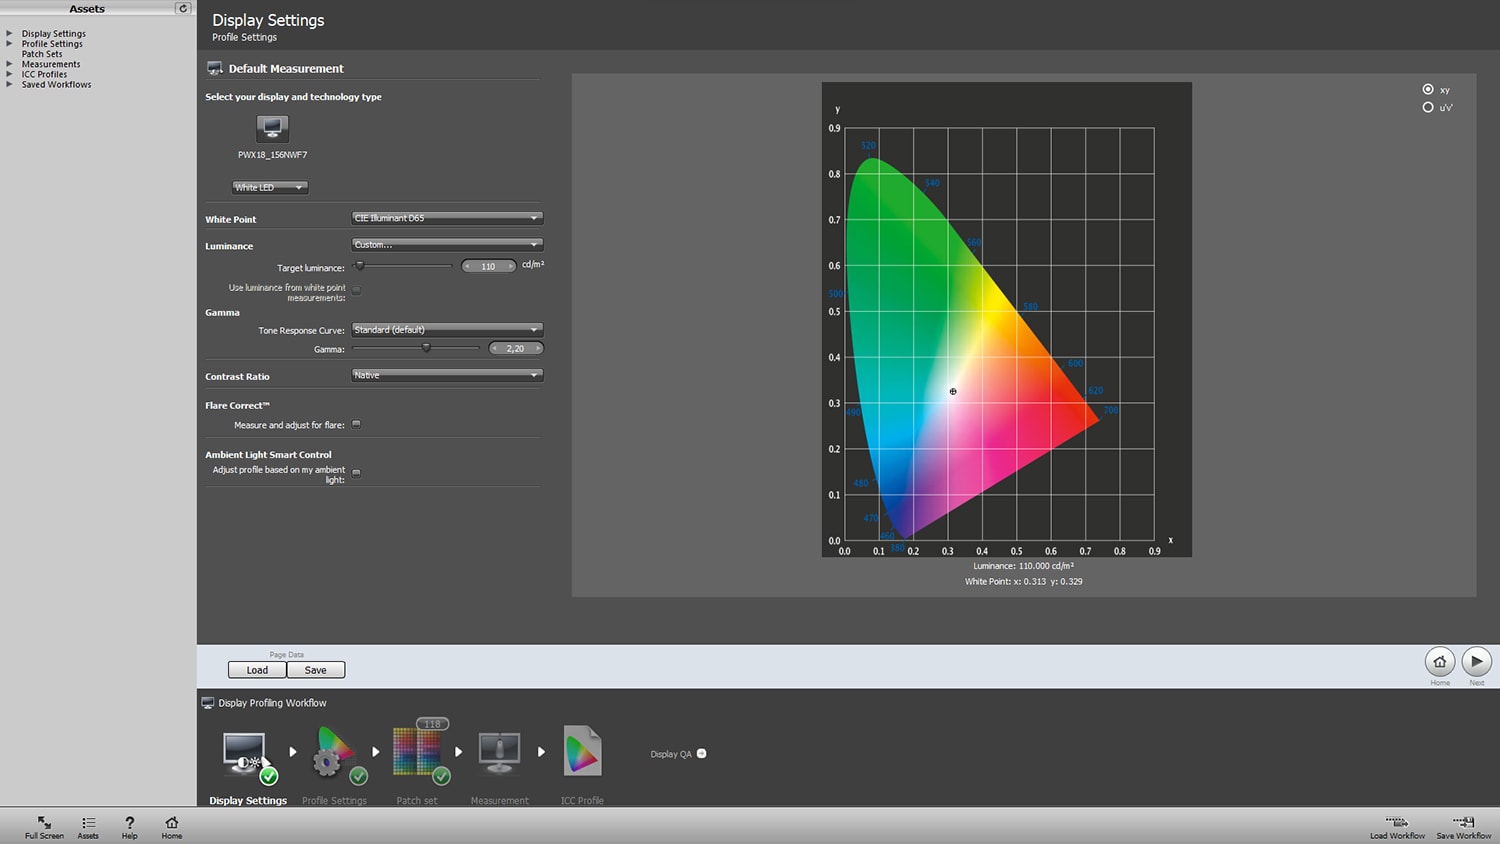
On the next screen, we basically make the most important settings:
- Display type and the White Point we usually leave at the default values.
- In Luminance we choose Custom option and give a specific value, as a rule, for content published on the Internet it is assumed 110-120 cd/m2, in case of printing 80-90 cd/m2, I use 110 cd / m2. It is worth mentioning that this value can be accurately measured with a calibrator. A separate topic is also to provide appropriate working conditions, i.e. a space that is rather shaded and does not change in relation to sunlight, gray walls would also be ideal, not affecting the perception of colors in the image.
- Gamma (curve representing a way of the digital image luminance interpretation) we set to 2.2 (another option may be 2.4 – this is the gamma for the Rec709 space, typical for a slightly darker film image).
- Contrast Ratio we leave on Native.
- We also do not select the Flare Correct and Ambient Light Smart Control options, as they may affect the uncontrolled change in the way the image is displayed during work.
There is also a Load or Save option below to load a file with these settings or save them for later. Then we click Next.
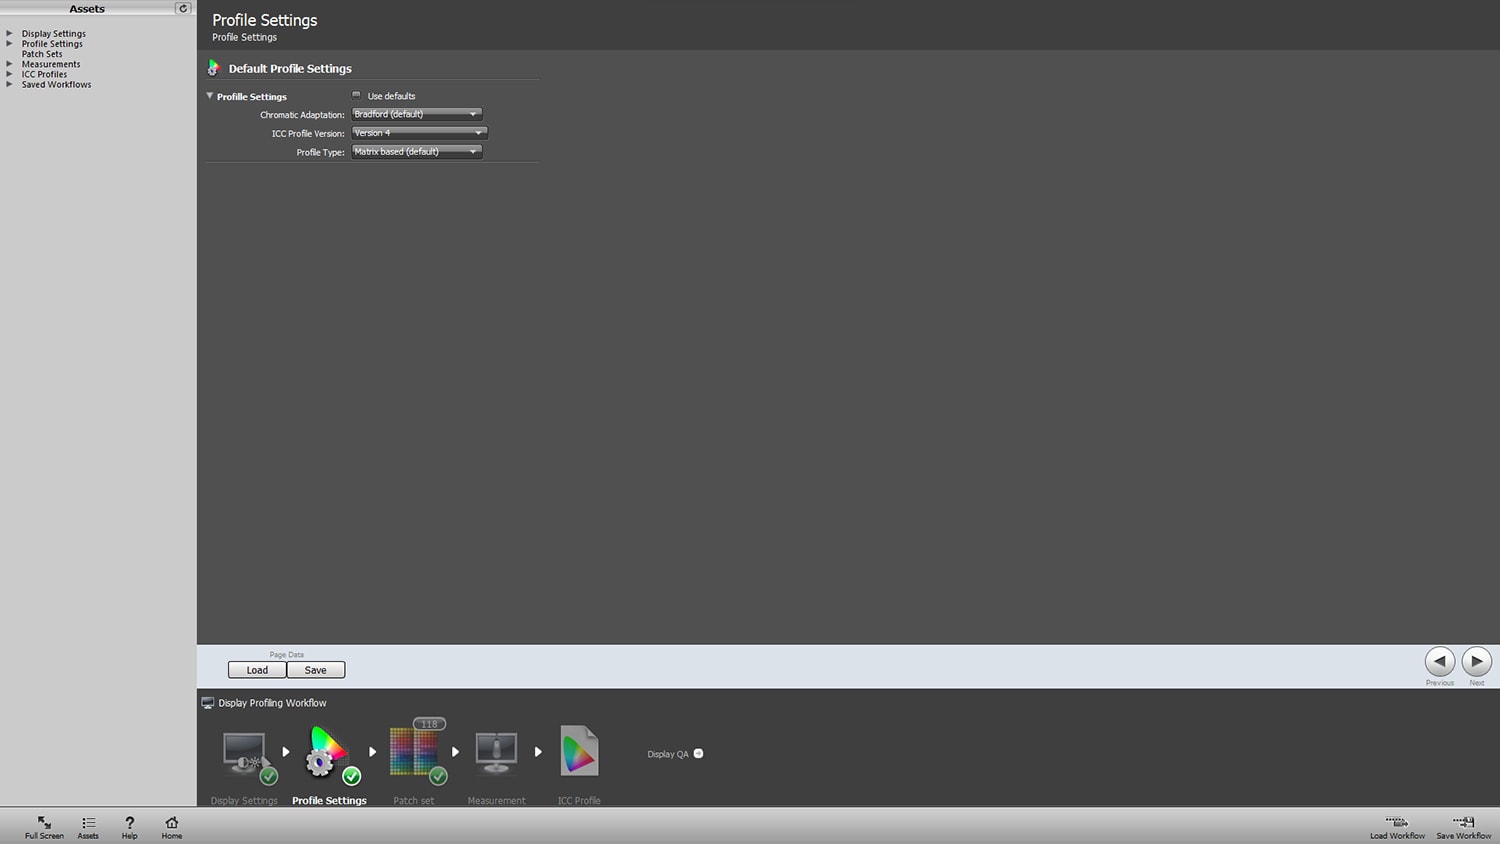
On the next screen, you can make settings for the profile itself, without going into details, I suggest selecting the ICC Profile Version -> Version 4 option and clicking Next.
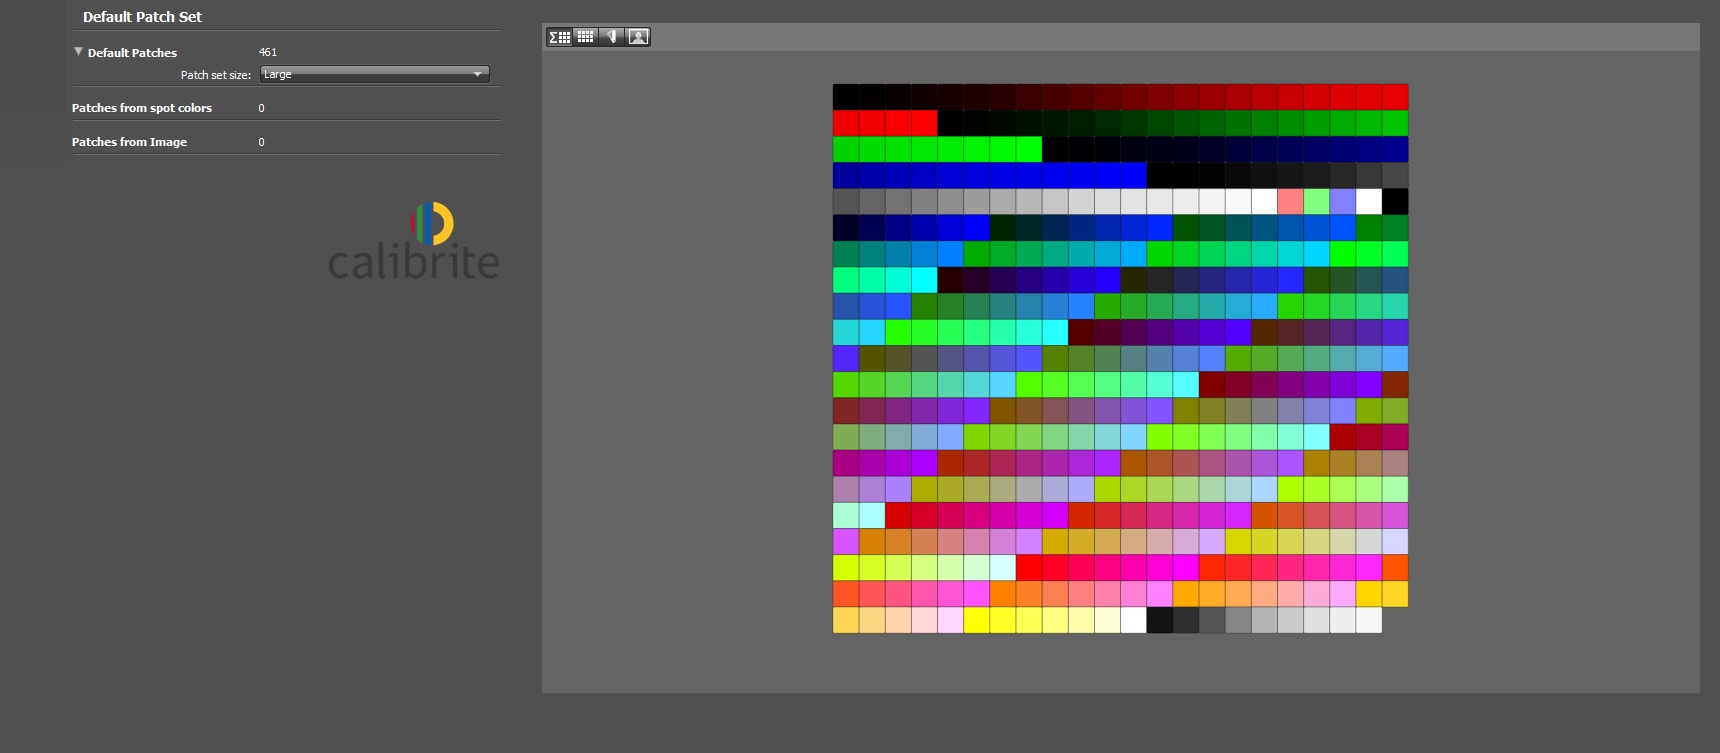
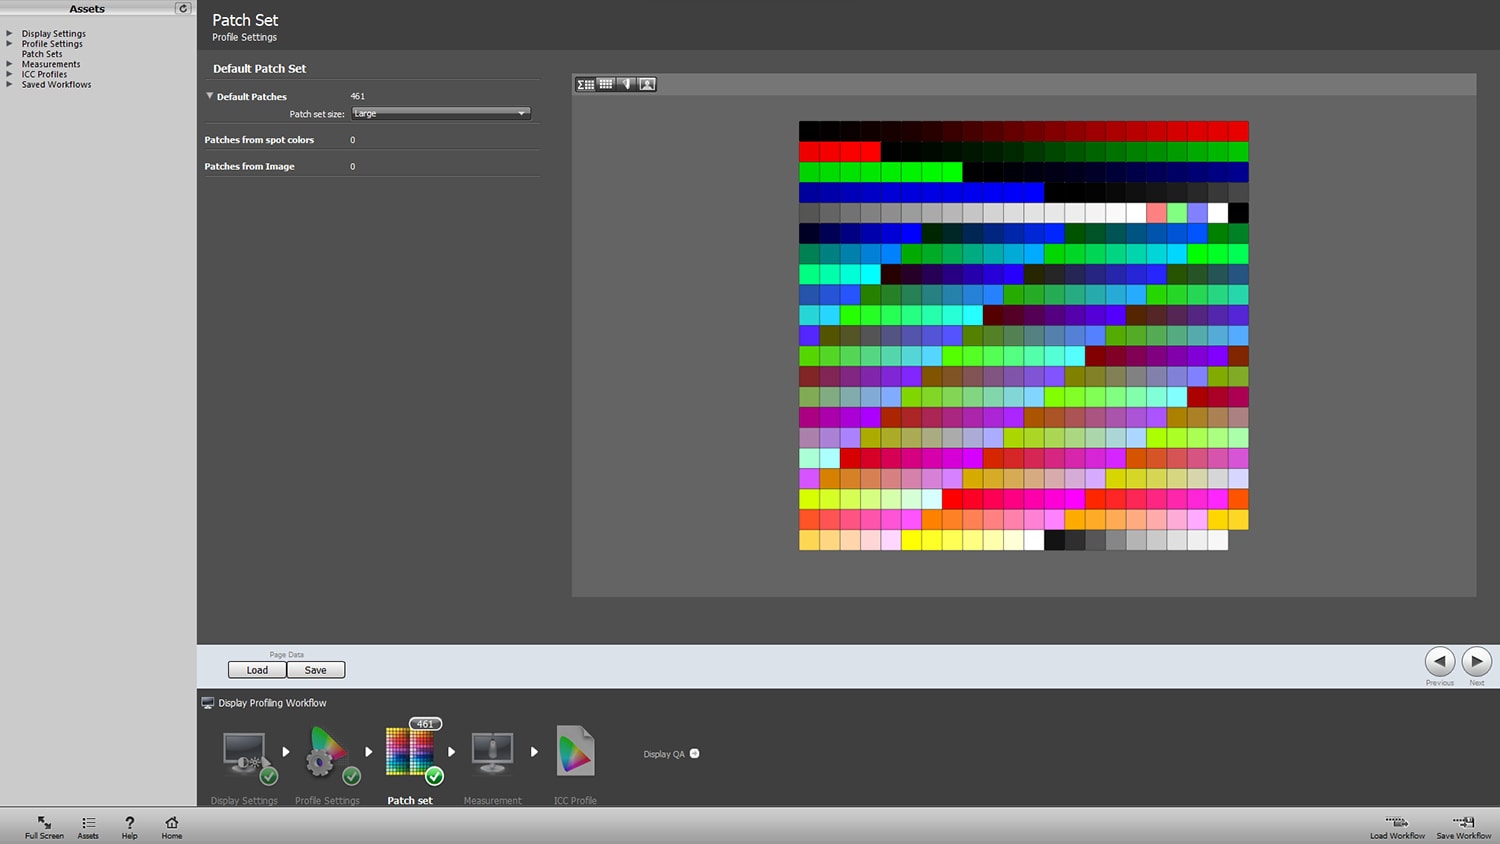
Here, on the other hand, we can set the number of patches that will be displayed during calibration, I suggest choosing Large, thanks to which the profile will be more accurate, and the process itself will only take 2-3 minutes longer.
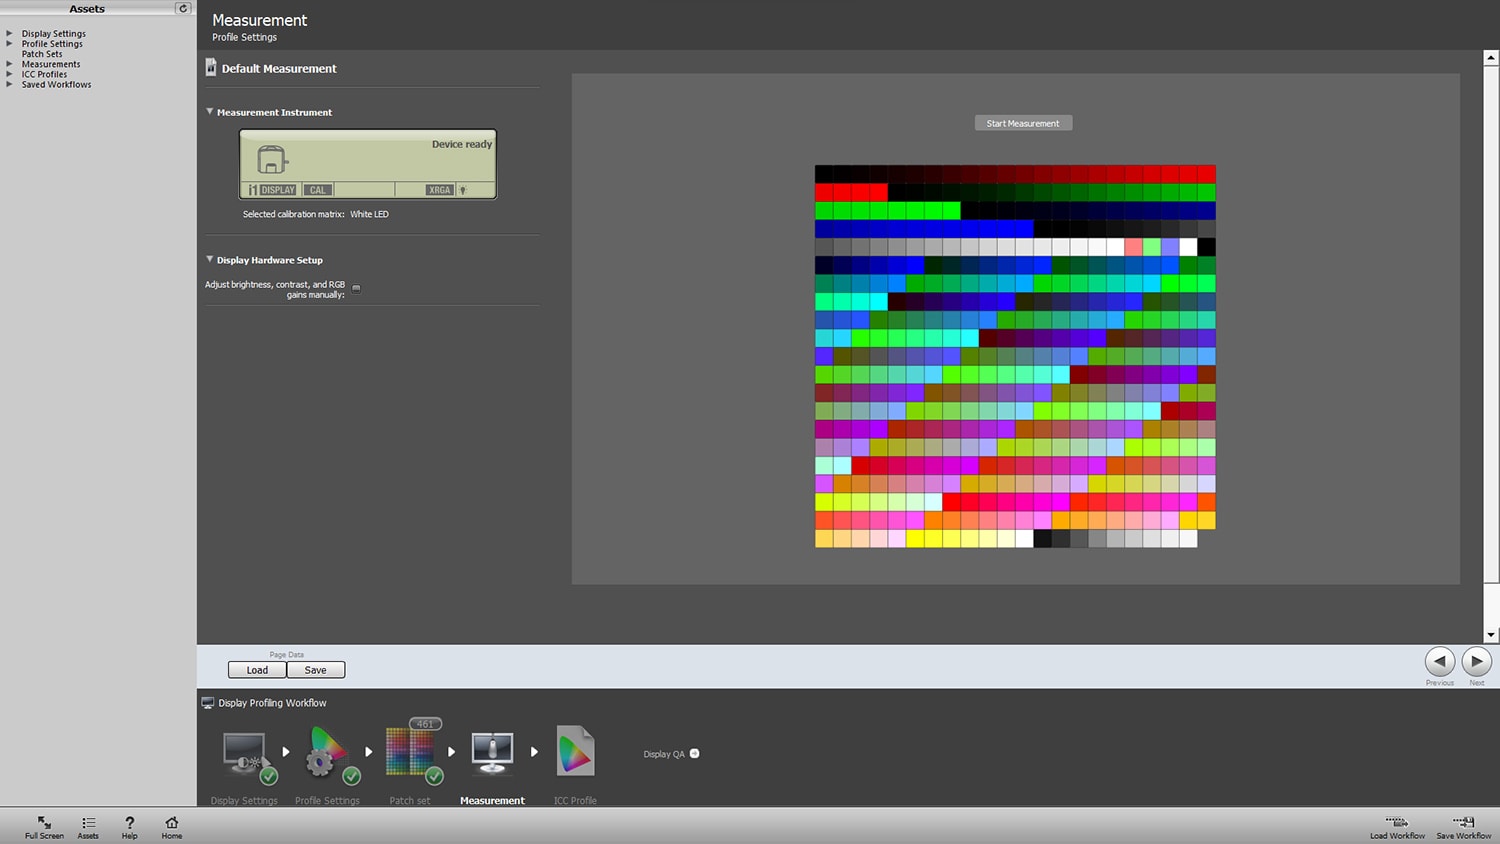
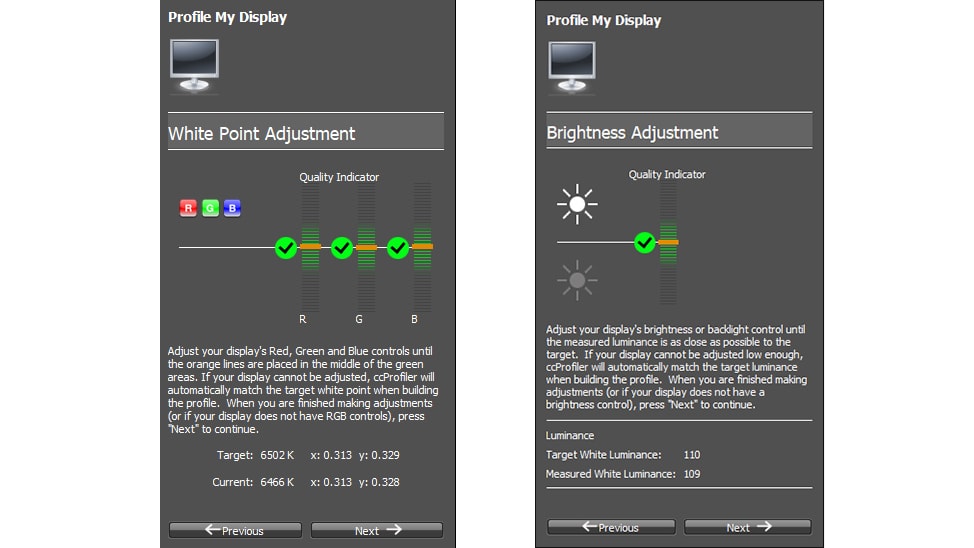
The next settings concern the possibility of manual adjustments of the brightness and RGB values. In case of calibrating the laptop display, I do not have such a possibility, so I leave this box unchecked. However, this option should be selected when calibrating the BenQ PD2500Q monitor.
In the next step, the program asks you to remove the cover from the calibrator and place it more or less in the center of the screen, it is also important to position it so that it rests perfectly on the display surface. Then the actual process begins, during which the calibrator records data from the screen. In case of a laptop, we will see different patches, first light and dark, then in different colors until the process is complete. However, in case of the Benq PD2500Q monitor, during the measurements, the program will display and, if necessary, ask you to manually change the monitor settings for both RGB (color temperature) and brightness values.
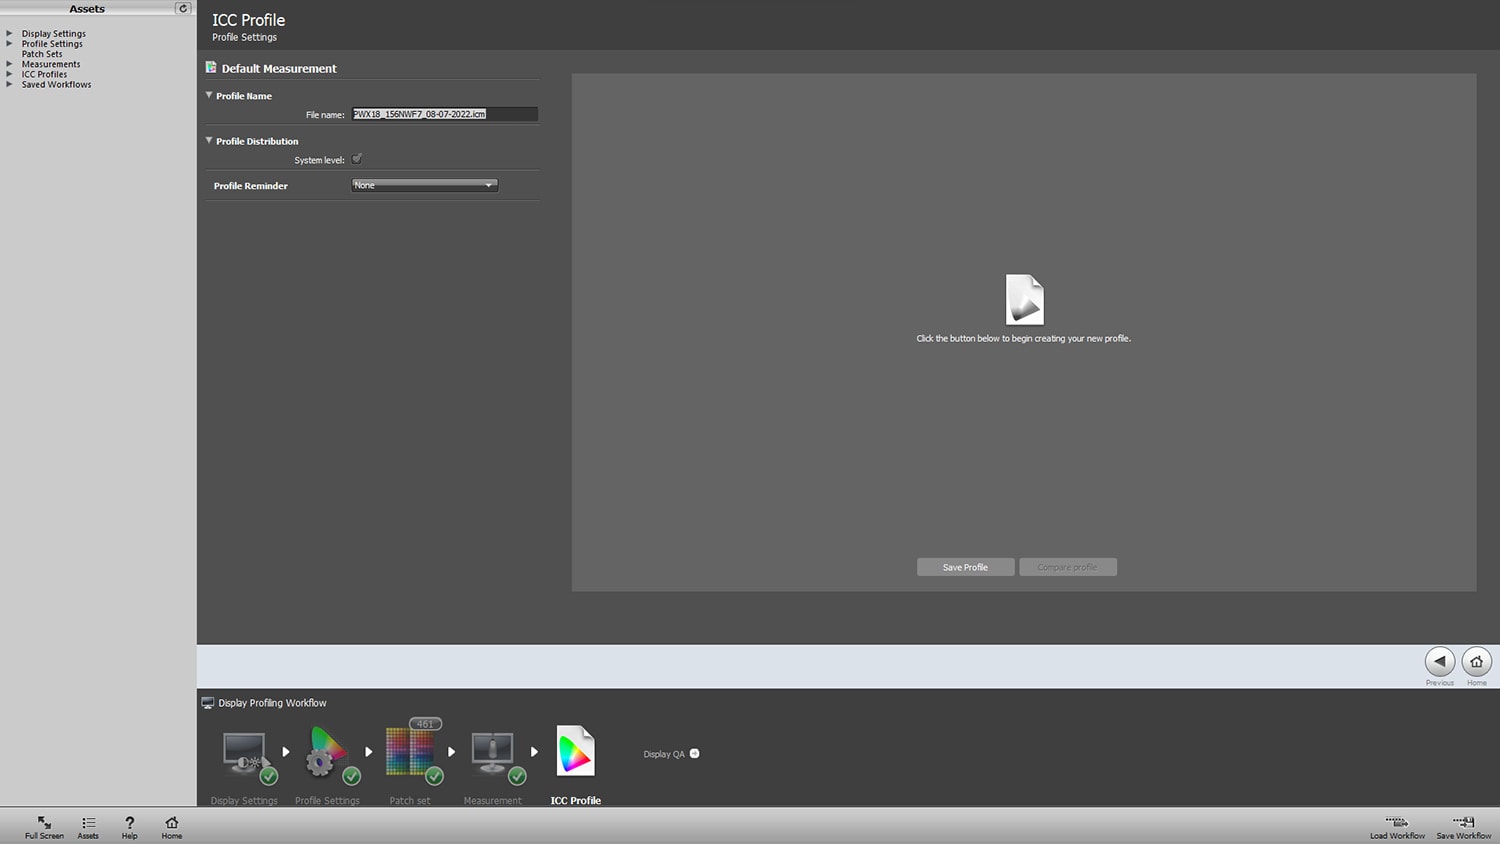
Finally, there will be a board with an editable proposed file name and the option to select Profile Distribution – System Level, making the created icc profile the default. We click Save Profile.
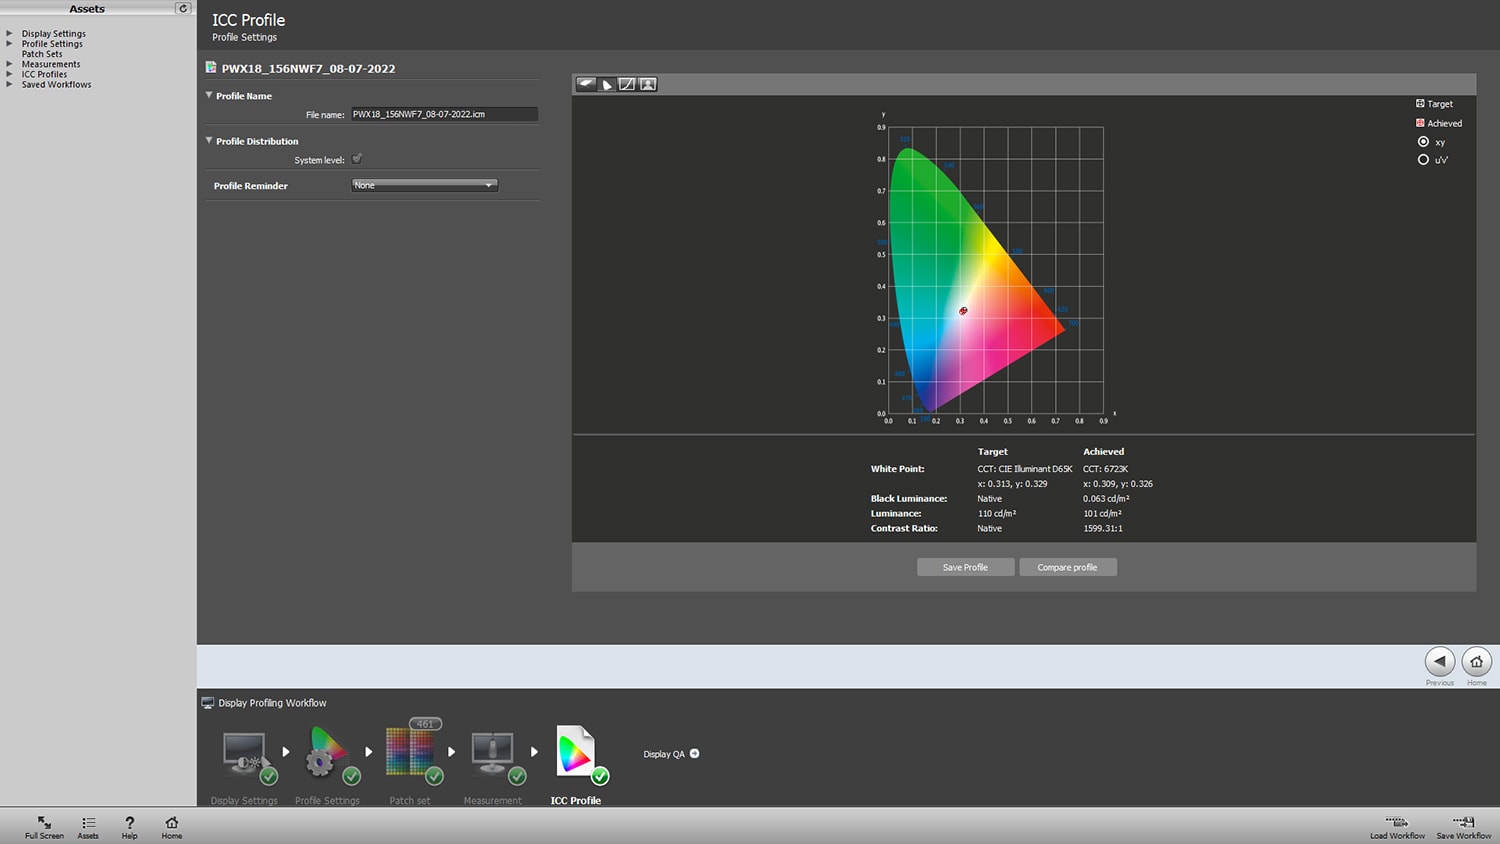
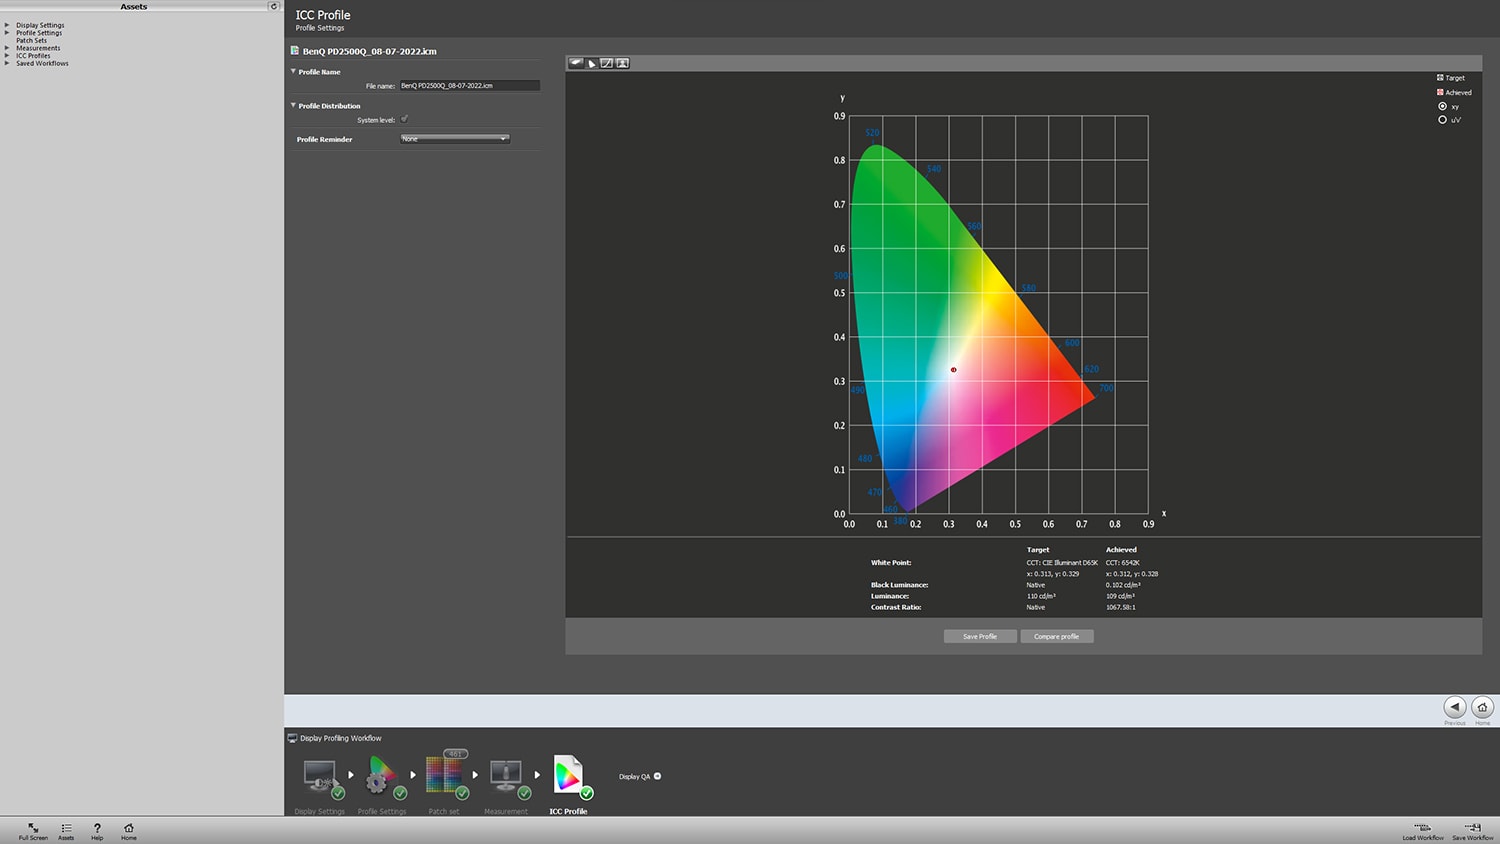
The profile has been saved. On the last board, we see the results obtained; below for the Dell Vostro laptop display and BenQ PD2500U monitor.
ICC PROFILES
I have no experience with macOS computers, but in Windows it is worth to know, that there is a Color Management tab where, after selecting a given device and selecting the “Use my settings for this device” option, you can manage profiles, e.g. by adding and/or removing them from the list of profiles associated with this device or by changing the default profile (removing a profile from the list does not remove it from the computer, you have to do it manually, also described in the previous entry). Finally, the currently used profiles can be quickly changed by right-clicking on the desktop and selecting “Display settings” and then “Color profile”.
CALIBRITE ANNIVERSARY PROMO
Believe it or not, on the day of the planned publication of this post, a Calibrite anniversary promotion was launched (without going into details, X-Rite has been acquired by Calibrite and has been selling products under its own brand for a year). I mentioned, that the recommended Calibrite Colorchecker Display Pro model costs about a thousand zlotys as standard, but from today you can buy it for only… 839 zlotys! The promotion also applies to other models, is available from selected distributors (e.g. here *) and lasts until 19th July 2022.
(* This is a link to a friendly store that I recommend and at the same time it is not an affiliate link.)
CALIBRATION FREQUENCY
Calibration is not a one-time process, displays change their properties and it is worth, let’s say once every six months, and certainly once a year to run it. For me, having a calibrator is a convenience, because I can reach for it at any time, saving, as in case of few monitors and various needs, the purchase paid off very quickly, but most importantly, the certainty, that I give the client the work which is not dependent on the randomness of my display settings.
SUMMARY
The process described above is definitely a big step forward for people who have not calibrated / profiled their monitors before, but you must be aware, that it is also not free from imperfections. However, looking towards more professional color work, the only option is hardware calibrated monitors, because this type of calibration can provide much more accurate results. Finally, for people who do not feel confident in this topic, I strongly recommend using the services of companies that deal with calibration professionally, which is a standard for creators working for the needs of e.g. television or large advertisers.
Live streams production
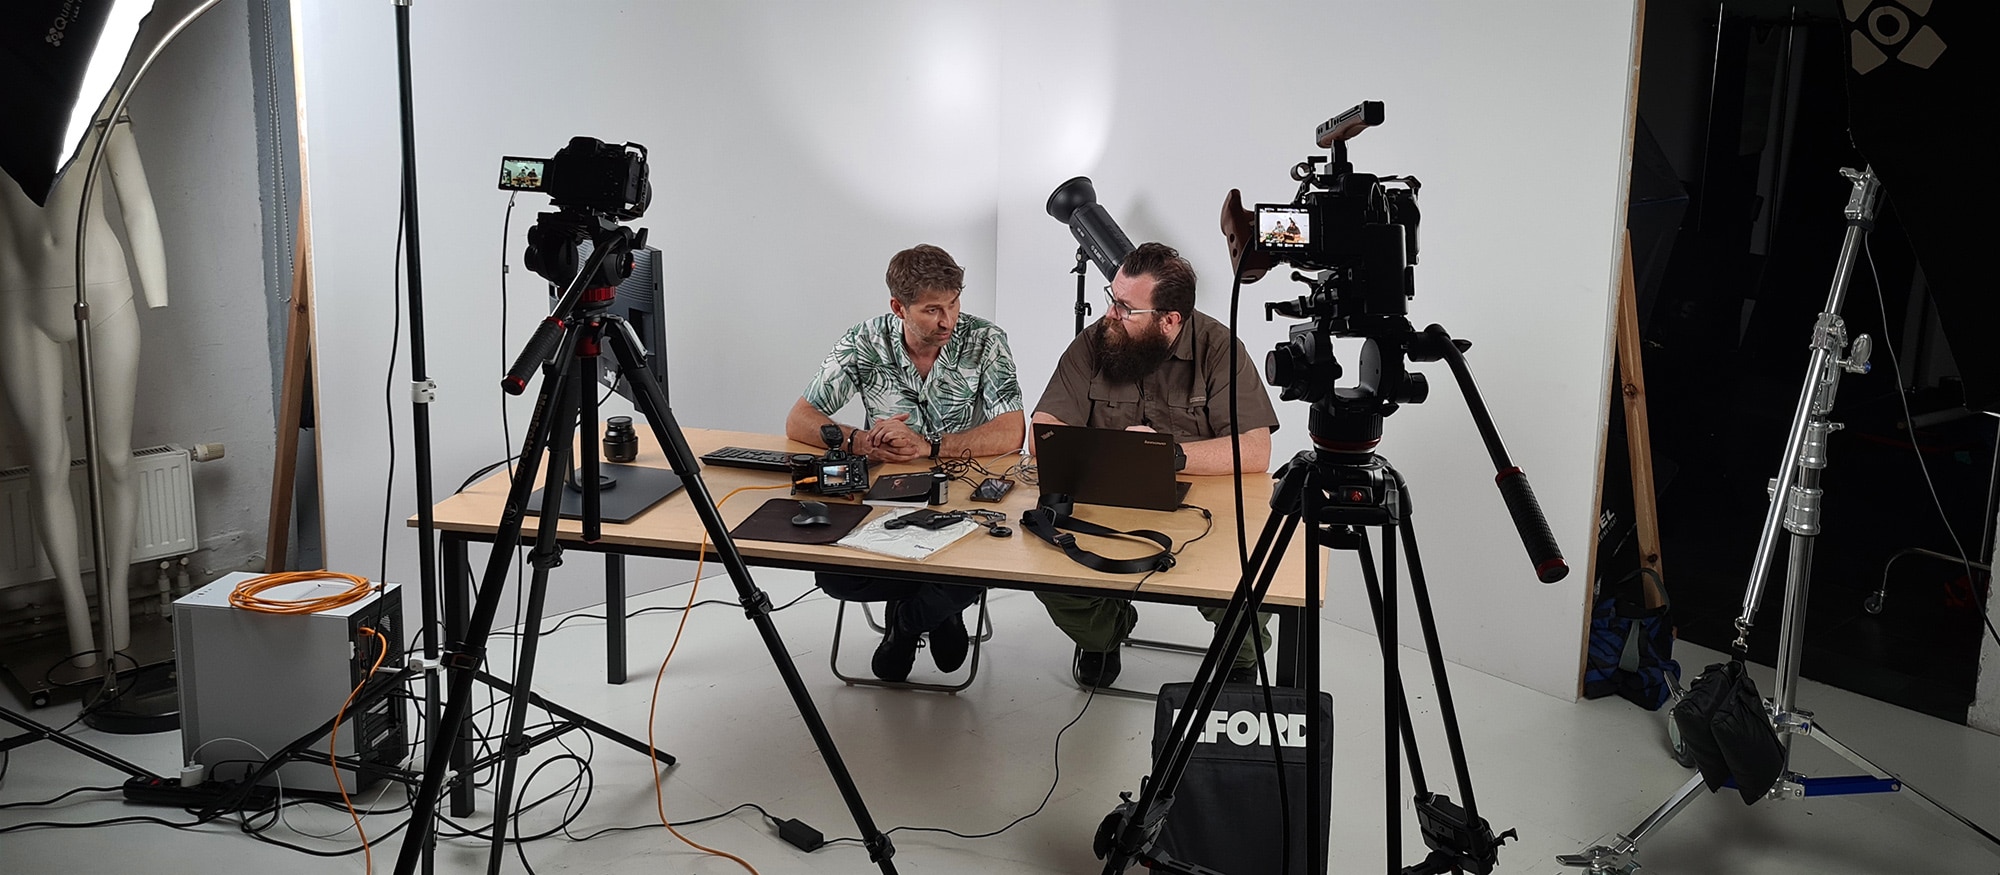
Due to the amazing development of the technology in recent years today the slogan of online broadcasting can cover both a teenager with a smartphone in his hand, as well as a multi-person, experienced team using extremely expensive equipment, and the only thing they have in common is Internet access. The Kaktus.studio offer is much closer to the latter option. So how does the backstage of such productions look like?
ATEM MINI EXTREME STREAM MANAGEMENT
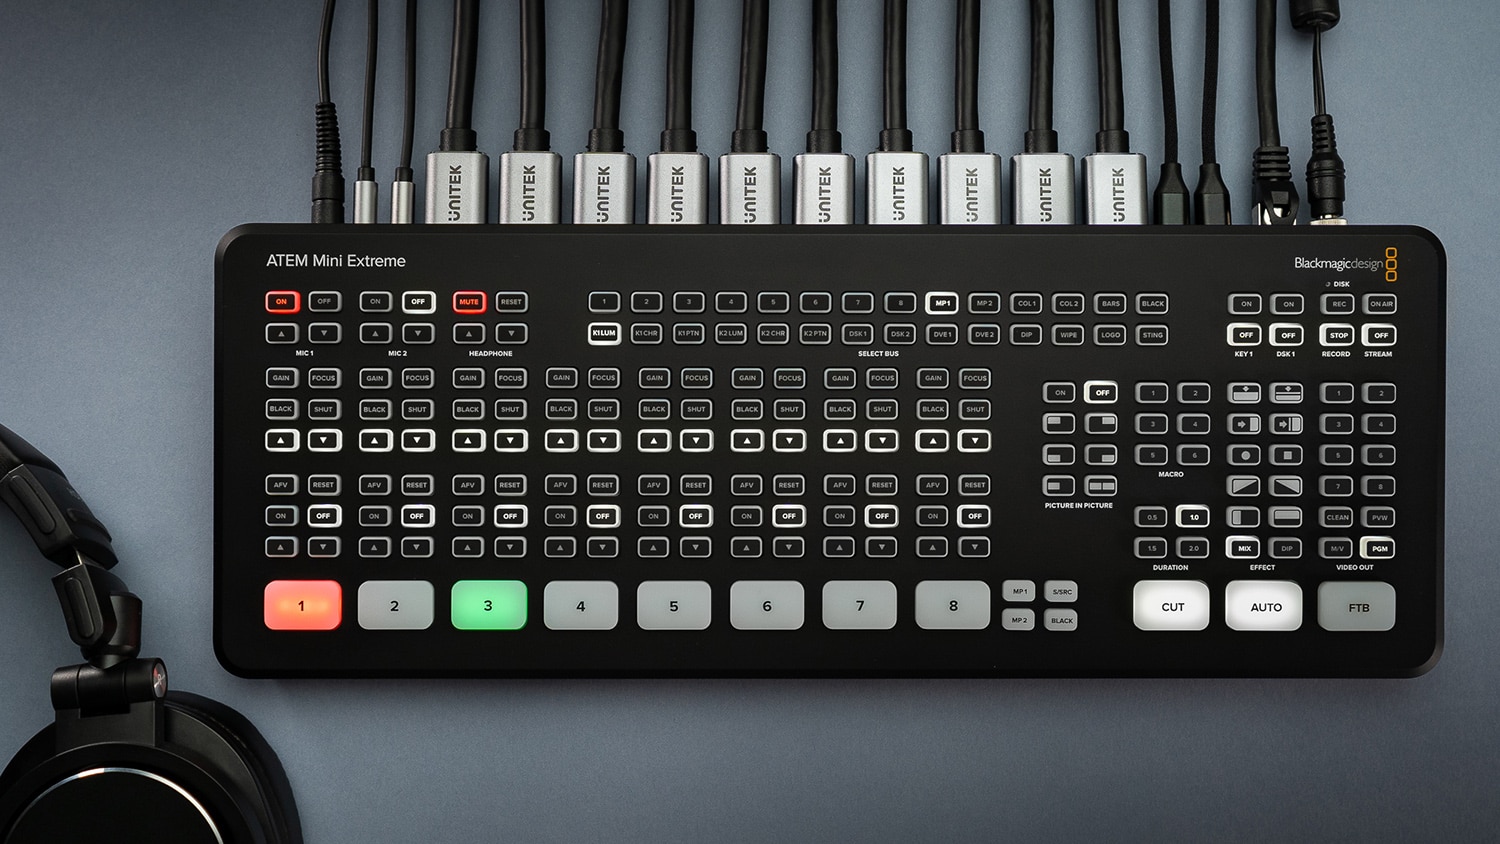
The real heart of the entire system is the image and sound mixer. Since Blackmagic Design launched new products from the Atem Mini series in 2019, the market has gained a completely new segment, previously reserved exclusively for high-budget productions. Whereas, when in 2021 the world saw the Atem Mini Extreme models, including Supersource functions and two USB and HDMI outputs, the possibilities have become so great, that with the appropriate quality of other equipment, experience of the crew and proper preparation for the transmission, their quality can be comparable to TV!
At Kaktus.studio we are using the Atem Mini Extreme mixer. This is a device that can input up to eight video (and audio) signals plus two separate audio signals. We can therefore use, for example, five cameras and three other devices, such as a laptop or tablet, sending presentations, films or graphics, and two separate microphones. The mentioned Supersource function allows for the simultaneous presentation of two or more sources on the screen using personalized graphics as backgrounds, and the whole can be dynamically changed (animated), which gives a very professional and aesthetic look for the recipients.
In addition, the device allows you to connect two monitors, one of which is used for multi-screen preview for the broadcast provider, and the other is directed towards the presenters, so they can view the currently transmitted image, or e.g. questions from viewers during the Q&A session. Of course, the entire broadcast is recorded on an external drive in original HD resolution, so the material can then be post-produced or immediately shared on other platforms. And two more words about the platforms; streaming can be carried out directly from the device on YouTube, Facebook, Vimeo, or other media that provide the so-called streaming key, or via a USB connection to a computer, where the computer is the transmitting device and Atem acts as a webcam for it.
CAMERAS
I mentioned above, that the transmission can be carried out with the use of up to eight cameras, everything of course depends on the budget and real needs. At Kaktus.studio we work with two own Sony a7sIII and Sony A7IV cameras, which guarantee the same picture and allow to obtain beautiful and natural colors with the S-Cinetone profile. If more equipment is necessary, we use a rental company. In addition, we have Manfrotto video tripods, thanks to which the movement of the camera is smooth and pleasing to the eye.
SOUND
It is said that the viewer’s tolerance level is much higher with the image than with the sound, and therefore we try to care for it to the highest degree. So, we have at our disposal, first of all, Sennheiser wireless systems with lavalier microphones, which are standard on many TV and radio stations. The next ones are Sennheiser and Rode directional microphones, as well as a Zoom H6 sound recorder. In addition, which I did not mention, the Atem Mini Extreme itself allows you to use functions such as the Equalizer with low and high pass filter, Expander or Limiter. All this means that the sound accompanying the image will be clear and pleasant to the ear, whereas the program hosts unrestricted by the space when moving around on the set.
LIGHTING ON SET
Another important element is the lighting on the set. We have at our disposal two Fomei lamps with a power of 210W each, together with softboxes with a diameter of 120 cm, and a smaller Aputure Amaran lamp with a power of 60W, also with a softbox. These lamps provide very uniform lighting in terms of color reproduction and have a variable color temperature, which allows them to adapt to the existing conditions on the set. In addition, if necessary, we use the lamps of a friendly manufacturer – Glare One.
PREPRODUCTION
To ensure the event’s success later, together with the client, we prepare a detailed scenario of all the activities on the air. We also make an appointment in advance to check the possibilities of setting cameras and lighting the scene, or test the quality of the Internet connection.
The offer of Kaktus.studio also includes the possibility of ordering the appropriate graphic design, including video clips for the start and end of the broadcast, matching the colors and logotype used by the client.
LIVE STREAMS PRODUCTION
Depending on the type and size of the event, we check in on the spot either the day before or on the day of the broadcast, but at least a few hours earlier, to calmly prepare for the implementation. The process of disassembling equipment, cables, etc. (and especially later assembling) is by far our least favorite part of the whole process. Then we go on the air, and the experience and prepared action plan allow us to work without unpleasant surprises. And when the broadcast ends, the satisfied faces of the participants say one thing: we got it!
POSTPRODUCTION
Finally, after the end of the broadcast, clients often share the record on social media, which can be previously corrected in the studio, as well as possibly supplemented with additional elements, such as subtitles for the deaf viewers or translations.
ADDITIONAL OPTIONS
Each client, each event is practically a different configuration and different needs. It is therefore worth knowing that during the transmission you can also use additional possibilities, such as:
- inviting guests participating remotely (e.g. via Zoom applications),
- keying, so-called greenscreen,
- conducting parallel transmissions, e.g. in Polish and English (assuming a signal is received from the interpreter’s booth),
- and others determined individually.
If you are thinking of online broadcast of your event, please contact me for more information!
What do I owe to photography
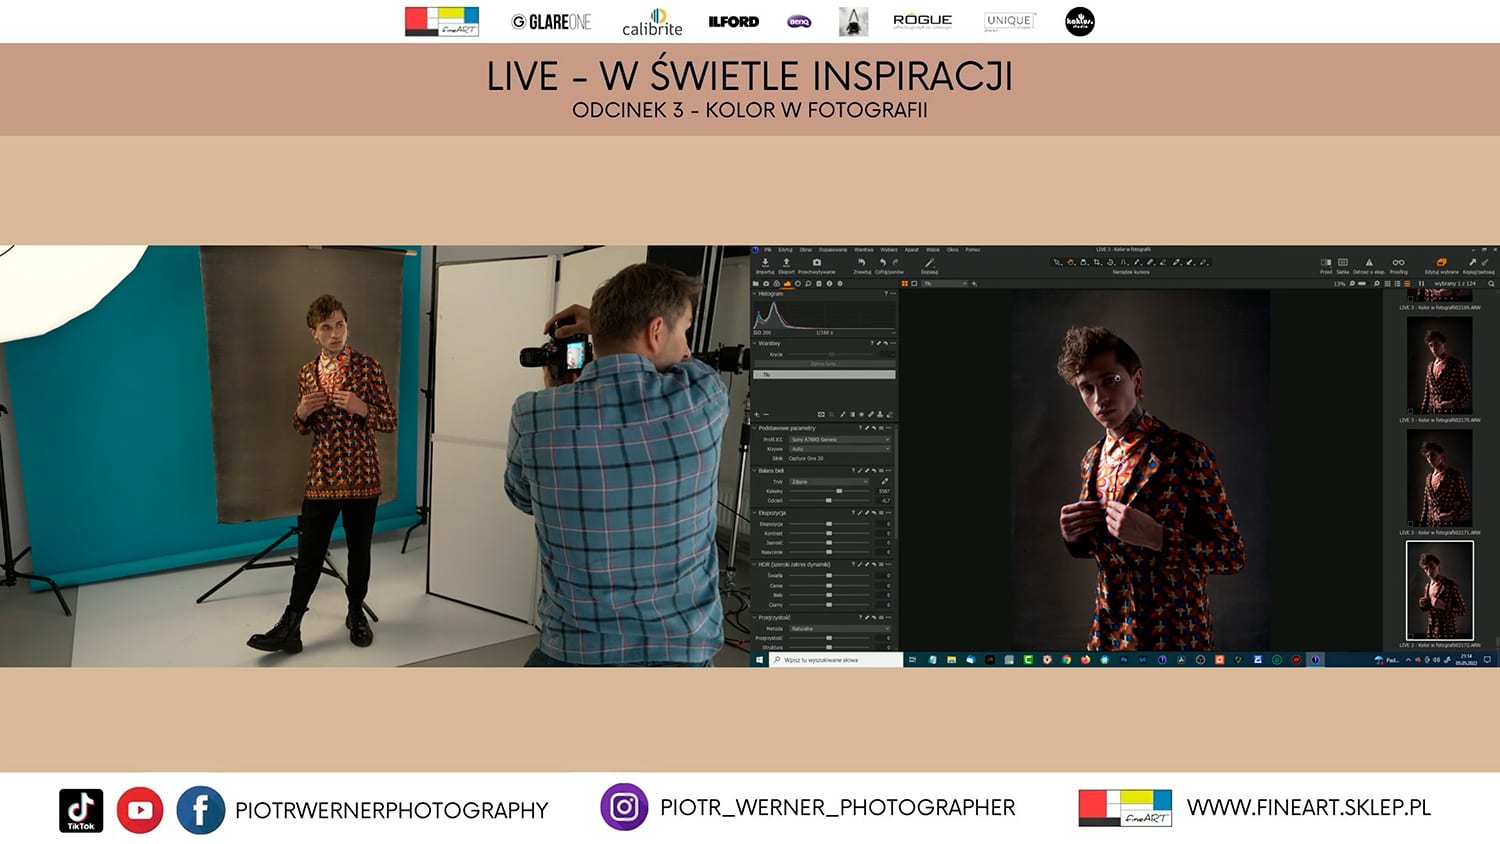
This post will be a bit more personal and significantly less technical than the others. Well, when I founded Kaktus.studio I realized, that I am finally doing what I love and that is honestly true. Each day spent on shooting and taking pictures was bringing me great fun, each workshop new knowledge, and each completed project extra experience. Today I can confidently say that I can handle constant and flash light, both in the studio and outdoors, I have worked with models, as well as children during school sessions. I know post-production techniques such as frequency separation, dodge and burn and many others that I used in my work. Up to a point, it seemed to me that I could continue to develop both as a photographer and a filmmaker. But in the end, I figured out that you need to focus on something to get to the next, higher level. And here the choice was easy for me, because deep down in my heart I was always much more drawn to the world of film. It aroused my fascination since I was a child, maybe due to more means of expression, such as camera movement or sound.
ROLE OF PHOTOGRAPHY IN FILM
Nevertheless, I feel that I owe a lot to photography, especially as a cameraman. “Photographic” thinking, allowing you to compose frames in this and no other way, is a great asset. Numerous workshops, especially by Piotr Werner, also taught me to think about light, about colors and to consciously use these values. The so-called DP (Director of Photography), is the second person on the set right after the director, and the Oscars for photography are among the most prestigious. The role of photography in the film is evidenced by recent titles such as “Dune”, “The Tragedy of Macbeth” or “West Side Story”, and the names of such people as Roger Deakins or Janusz Kamiński should be familiar to all fans of the cinematography.
PIOTR WERNER PHOTOGRAPHY
I have already mentioned Piotr, who was my photo mentor from the beginning, and now a friend and person with whom I share joint projects. Piotr is a winner of many prestigious awards and, above all, the author of fascinating photos, so I encourage you to visit his website www.piotrwerner.pl and, of course, use his services.
MY PHOTOGRAPHY
And below a dozen of my photos.
DaVinci Resolve quick tips #1
Recently, in social media I have started a series of so-called “quick tips” about DaVinci Resolve, while here on the blog they will appear less often, but collected in a slightly larger whole. Hope you will find them interesting, I invite you to read part 1.
HOW TO MANAGE MEDIA AFTER FINISHING THE PROJECT?
New project, preparation, shooting, editing, and finally a satisfied customer! And what then? You stick with a bunch of unnecessary files, or maybe not? How to manage them effectively in DaVinci Resolve? I deffinitely recommend to archive the project together with media files, but in order to save a disc space only these, which were really used. There are at least two methods, to do that easy and efficiently:
- Method 1. In File tab we open Media Management. This tool has much more options, but here we aim to copy the files, so in Entire Project we choose Copy, and then tick Used media (or even Used media and trim… to copy only these parts of clips, that were used, plus handles). In addition choosing Relink to new files we set a new location of our source files, and then again from File tab we export the whole project (drp).
- Method 2. In Media Pool we create a Smart Bin filtering files by Usage attribute (is 0), adding however a few exclusions for types like Fusion, Timeline, Still, etc. And then the received list of files (which are not used) can be removed. In the next step in Project Manager we create Project Archive (dra), which includes both project and source files. And it’s done!
HOW TO SPEED UP WORK IN THE COLOR TAB?
One of the methods, that let you work in the Color Tab much faster, is the ability to grade more clips at the same time. How can you then get it?
- Change of mode from Clip to Timeline. The standard mode in the Color Tab is Clip, which means, that all of the changes you make in Nodes refer only this particular clip. Whereas, if you change it in the upper right corner to Timeline, you influence all the clips sitting on the timeline.
- Creating group and work in modes Pre-Clip or Post-Clip. Another option is selecting appropriate clips (at least two) and creating a group. Then, for these clips you get another modes to choose from, besides Clip & Timeline, also Pre-Clip & Post-Clip. As the names suggest, you will influence all the clips from the group before and after changes made in Clip mode. You can create many groups, but one clip can belong only to one group.
It is worth to mention here about the order on the so called pipeline, which looks following: Pre-Clip -> Clip -> Post-Clip -> Timeline. Most often Pre-Clip is used for color space transform or gamut mapping, Clip for normalizing, matching or local corrections, Post-Clip for creative grade, finally on Timeline you can introduce such ‘final’ effects like for instance grain, but this doesn’t have to be a rule.
- Work in Remote Version. Other option is work in Remote Version which, unlike Local Version, gives option to influence all the timeline clips, that belong to one ‘source’ clip in the Media Pool. Let’s suppose you have a long interview mixed with b-roll clips. Normally you would have to grade all the interview clips separately, while using Remote Version grading one you make changes on all the remaining ones automatically.
These are not all the possibilities, but if you apply them, you already can win a lot of time during work in post.
CHOSEN KEYBOARD SHORTCUTS, WHICH IS REALLY WORTH TO KNOW!
Keyboard shortcuts can speed up work in many programs and DaVinci Resolve is no exception. Here’s 10 chosen shortcuts, which are really worth to know:
- Shift + Z – quick Timeline rescalling to full screen width (and back).
- Alt + scroll – scrolling with pushed Alt button scales the Timeline.
- Shift + scroll – scrolling with pushed Shift button increases/decreases the hight of the video tracks (if cursor is above the video tracks) or audio tracks (if cursor is above the audio tracks).
- I and O – they mean selecting In point (beginning) and Out point (end) of the selected range of the clip or Timeline.
- Alt + x – whereas with this one you can remove the previous selection range.
- Alt + selection – with the pushed Alt button, if the clip has also audio track – you can select only video, or only audio (you can of course also turn off Linked Selection option).
- D – selected clip with pushing D becomes disabled (not visible) and/or muted.
- Shift + selection – with Shift button pushed you can move selected clip up/down without the risk, that it will accidentally be moved left/right even of a single frame.
- Alt + selection – this time with Alt button pushed, but moving the selected clip left/right/up/down, the clip will be duplicated. With this method you can also duplicate even transitions.
- Alt + V – to copy clips you can also use a standard shortcut Ctrl+C/Ctrl+V, but sometimes even more useful might be copying only clip atributes, like Zoom, Position, etc. – then instead of Ctrl+V use Alt+V, and the window will open to let you decide which atributes shall be copied.
And one more at last: Ctrl + Alt + K, which opens the window, so you can explore all the existing shortcuts (there are much more then the above ones) and create your own. Keyboard shortcuts find also a very useful application in consoles like Loupedeck or Elgato, where even a whole macro can be mapped to one button with a nice icon!
